Keeping Track of Feature Flags
This guide provides tips for keeping your Feature Flag workspace organized in DevCycle. The article covers general methods for organizing Feature Flags, such as creating specific names and detailed descriptions. It also provides insight on how to maximize DevCycle’s tools like Variables, Jira linking, and Code References to manage large amounts of feature flags.
Setting Appropriate Identifiers
Setting appropriate Feature Flag names upon creation allows developers to identify flags more easily in the future. It is important to create descriptive, human-readable identifiers for all your Feature Flags.
In DevCycle, Features have two types of identifiers:
- Name — the display name on the Feature Management Dashboard
- Key — used to reference the Feature in code (DevCycle automatically suggests keys based on the entered name)
You specify these identifiers whenever you create a Feature.
Naming Conventions
Many organizations have naming conventions as part of their style guide. If your organization has one, use their style guide. The following list suggests vital information for names and keys:
- the intent of the flag
- what is affected upon changing the flag’s value
- where the effect occurs, such as the interface element or web page
For example, let’s say you’re making a button on a website’s navigation bar that links to a Premium Users page. You may want to create a flag that is responsible for the button’s visibility. An appropriate flag name could be Enable Premium Users Navigation Button. This identifier allows developers to know the intent of the flag—to toggle the Premium Users Button, the flag’s effect—the button’s visibility will turn on and off, and where the effect occurs—the Navigation.
Writing Effective Descriptions
In addition to specific names and keys, short descriptions let your teammates know other essential details about the flag. An appropriate description may include some of the following:
- further context for the Feature Flag’s purpose (why it was created)
- the effect of changing the flag’s value
- whether or not the Feature Flag is permanent, or when it can be removed if it is temporary
- which team is responsible for the Feature Flag
Adding relevant details to your descriptions makes it easier to determine the flag’s importance and when it should be removed.
You have the option to add a description upon creating a feature in DevCycle. Alternatively, you may add or edit the description after creating the feature. Navigate to “Settings” on your feature’s page and edit the Description box.
As for variables, you can add a description from the Variable Dashboard. Click “View Info” on the variable you’d like to add a description for and edit the Description box.
Feature Grouping using Variables
As developers get in the groove of developing with Feature Flags, more and more flags are created. It won’t be long before hundreds or even thousands of flags are in use. Oftentimes, several of those flags may pertain to the same feature but are not categorized as such. Take into consideration our Premium Users example from earlier. Let’s say we would like to add a page for our button to link towards. On another feature management platform, we would have to create a completely new flag on the dashboard. Any other new aspect of the page would be another additional flag. Eventually, we’d have several loose flags, cluttering our workspace!
Fortunately, DevCycle has a solution: a distinction between features and flags. DevCycle sees flags as parts of a feature. While they may work independently, they are not stand-alone in that they toggle different aspects of the same feature and must be grouped accordingly. This distinction allows for Feature Flag Grouping using Variables. In DevCycle, Variables are like flags associated with a general Feature. They have values that can be toggled like a flag. In this way, you can see Features as flag groupings and Variables as the flags themselves. Developers can then create Variables that are grouped into Features.
Let’s return to our Premium Users button example. Before we create a flag, we must consider what overarching Feature our flag will be a part of. For instance, we can create a Feature named Premium Users Navigation. All the flags pertaining to Premium Users from the Navigation will fall under this feature. Within Premium Users Navigation, you can add a boolean variable with the key enable-premium-users-button to toggle the button’s visibility.
It is important to note that while our variable key was specific to the button, we created a general name for the feature it was housed in—we named our feature Premium Users Navigation rather than Premium Users Navigation Button. Having a slightly more general name leaves room for other variables related to this feature. So if we would like to create a new page for premium users, a flag to gate this page would also fit within the Premium Users Navigation feature.
Allowing a feature to have multiple variables eliminates the technical debt of having several uncategorized flags. When you want to create a new flag, ask yourself whether it would be appropriate to create a new feature or add a variable to an existing feature instead. Organizing by feature allows you and other developers to locate variables effortlessly based on their associated features.
To explore Feature Grouping in greater detail, check out our best practice guide on Feature Flag Grouping.
Linking Your Features to Jira Tickets
Another way to keep your workspace organized is to utilize DevCycle for Jira. Development teams often use several different tools to track workflow. When tools for project management, code repositories, and feature management are all isolated from one another, it can be cumbersome to distinguish a feature’s exact status in the development lifecycle.
To combat the juggling of siloed information, DevCycle for Jira links tickets directly to your features. This allows you to view your feature’s status within Jira.
To start connecting Jira Ticket IDs to DevCycle features, you must install the app from the Jira Marketplace Listing. We recommend reading DevCycle Feature Flag Management for Jira for a setup guide.
Once you have configured a Jira project with a DevCycle project, you can connect a feature to a Jira Issue from the feature’s settings. Simply enter the IDs of the ticket(s) you’d like to associate with the feature.
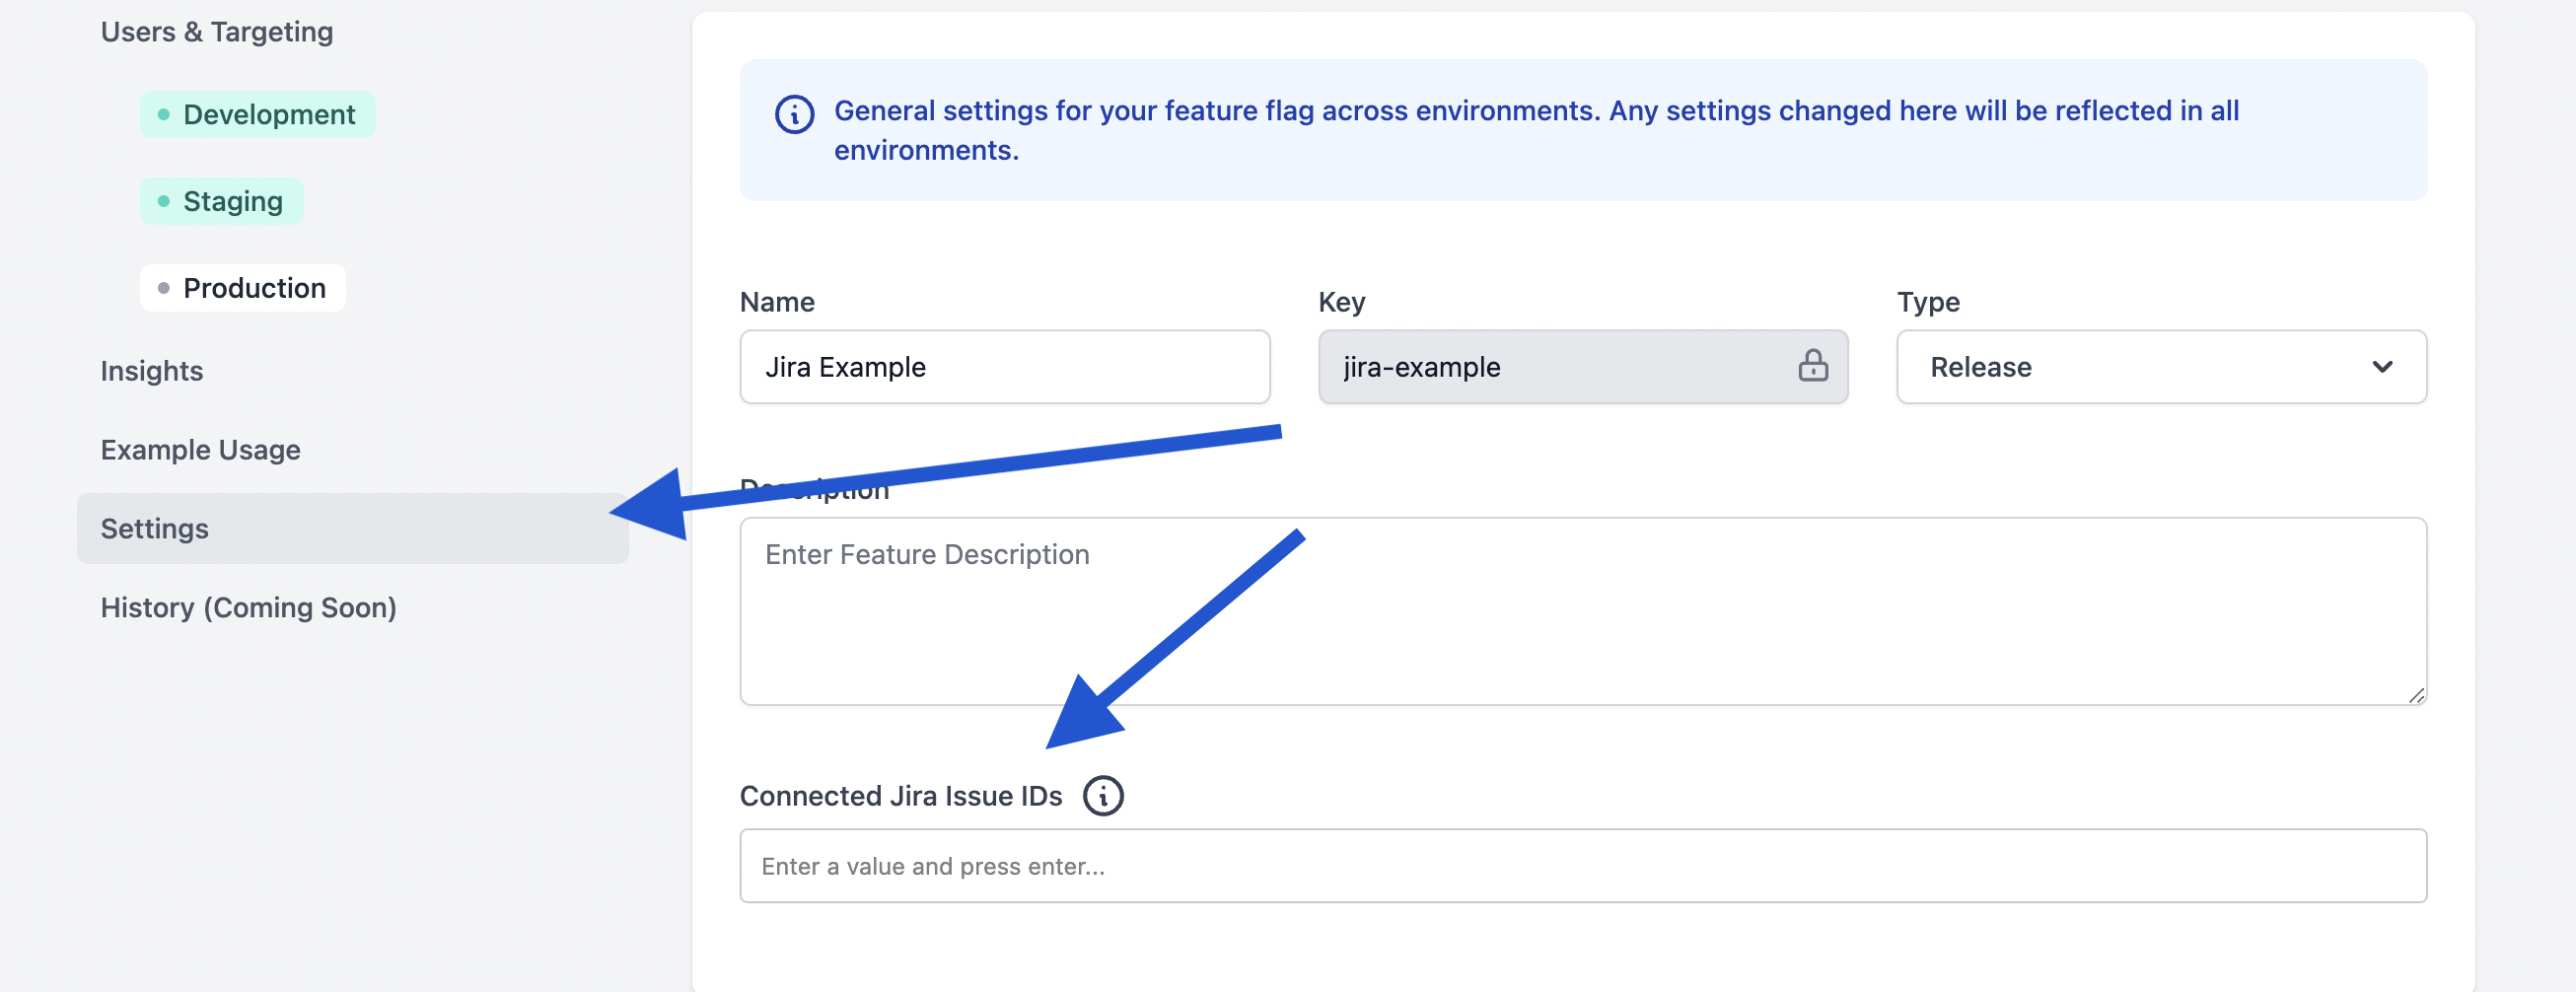
Simply enter the IDs of the ticket(s) you’d like to associate with the feature.

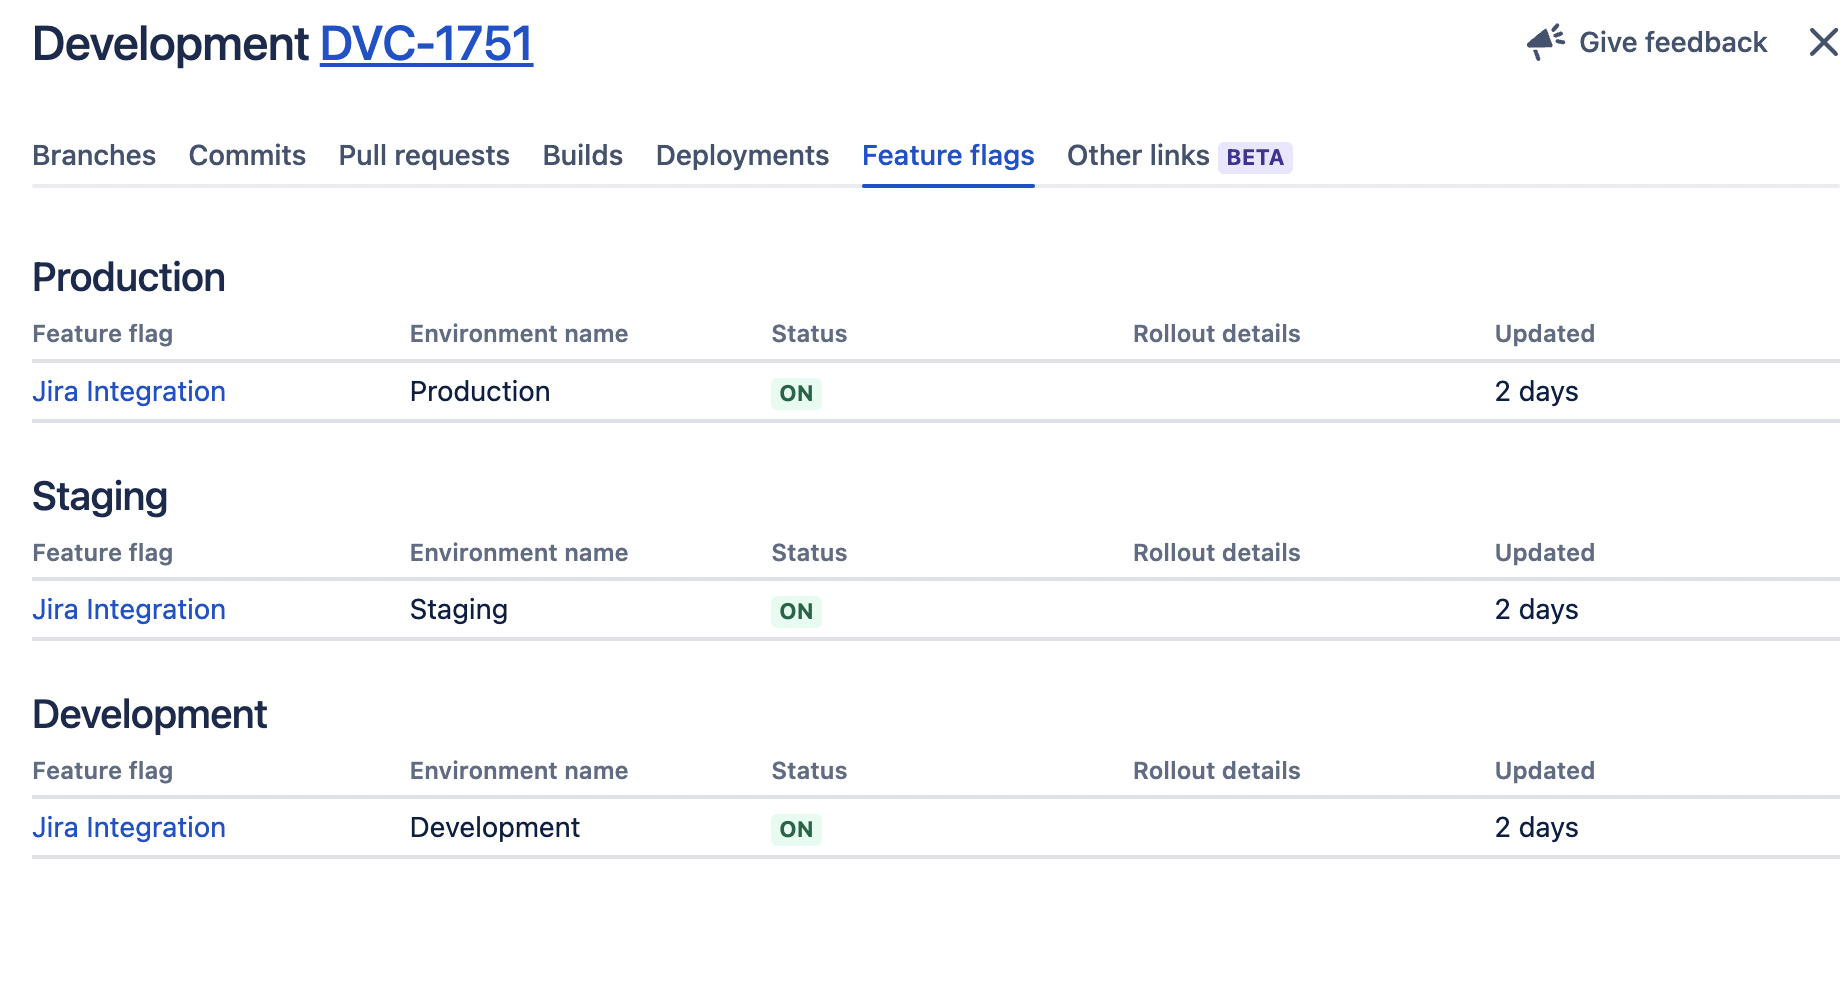
Once it is saved, you will be able to view your feature’s status from Jira at any time. In Jira, navigate to the ticket you have connected and view the “Releases” section.

Clicking this will display all the feature status information across all environments:
A common use for DevCycle’s Jira linking is to connect a feature in DevCycle to a Jira epic. This allows each team, whether dev or product, to easily determine the status of an epic. Product managers and developers alike will no longer have to dig through features in DevCycle; feature statuses can all be monitored directly in Jira.
Another helpful way to view Jira linking is to consider feature variables responsible for a story within your epic. Making variable-story relationships can help you create appropriate variables for your features and define their purposes better.
Backlog grooming sessions are a great opportunity to discuss the need of a feature flag. Including a discussion of feature flags during backlog grooming encourages developers to plan on creating feature flags when necessary and link them to Jira tickets.
Using Code References to Track Variable Usage
Code References are another helpful tool to foster an organized workflow. DevCycle uses a GitHub action to locate each variable’s reference in your code. All the references to a specific variable are collected in one place on the Variable Dashboard, as seen in the example below:
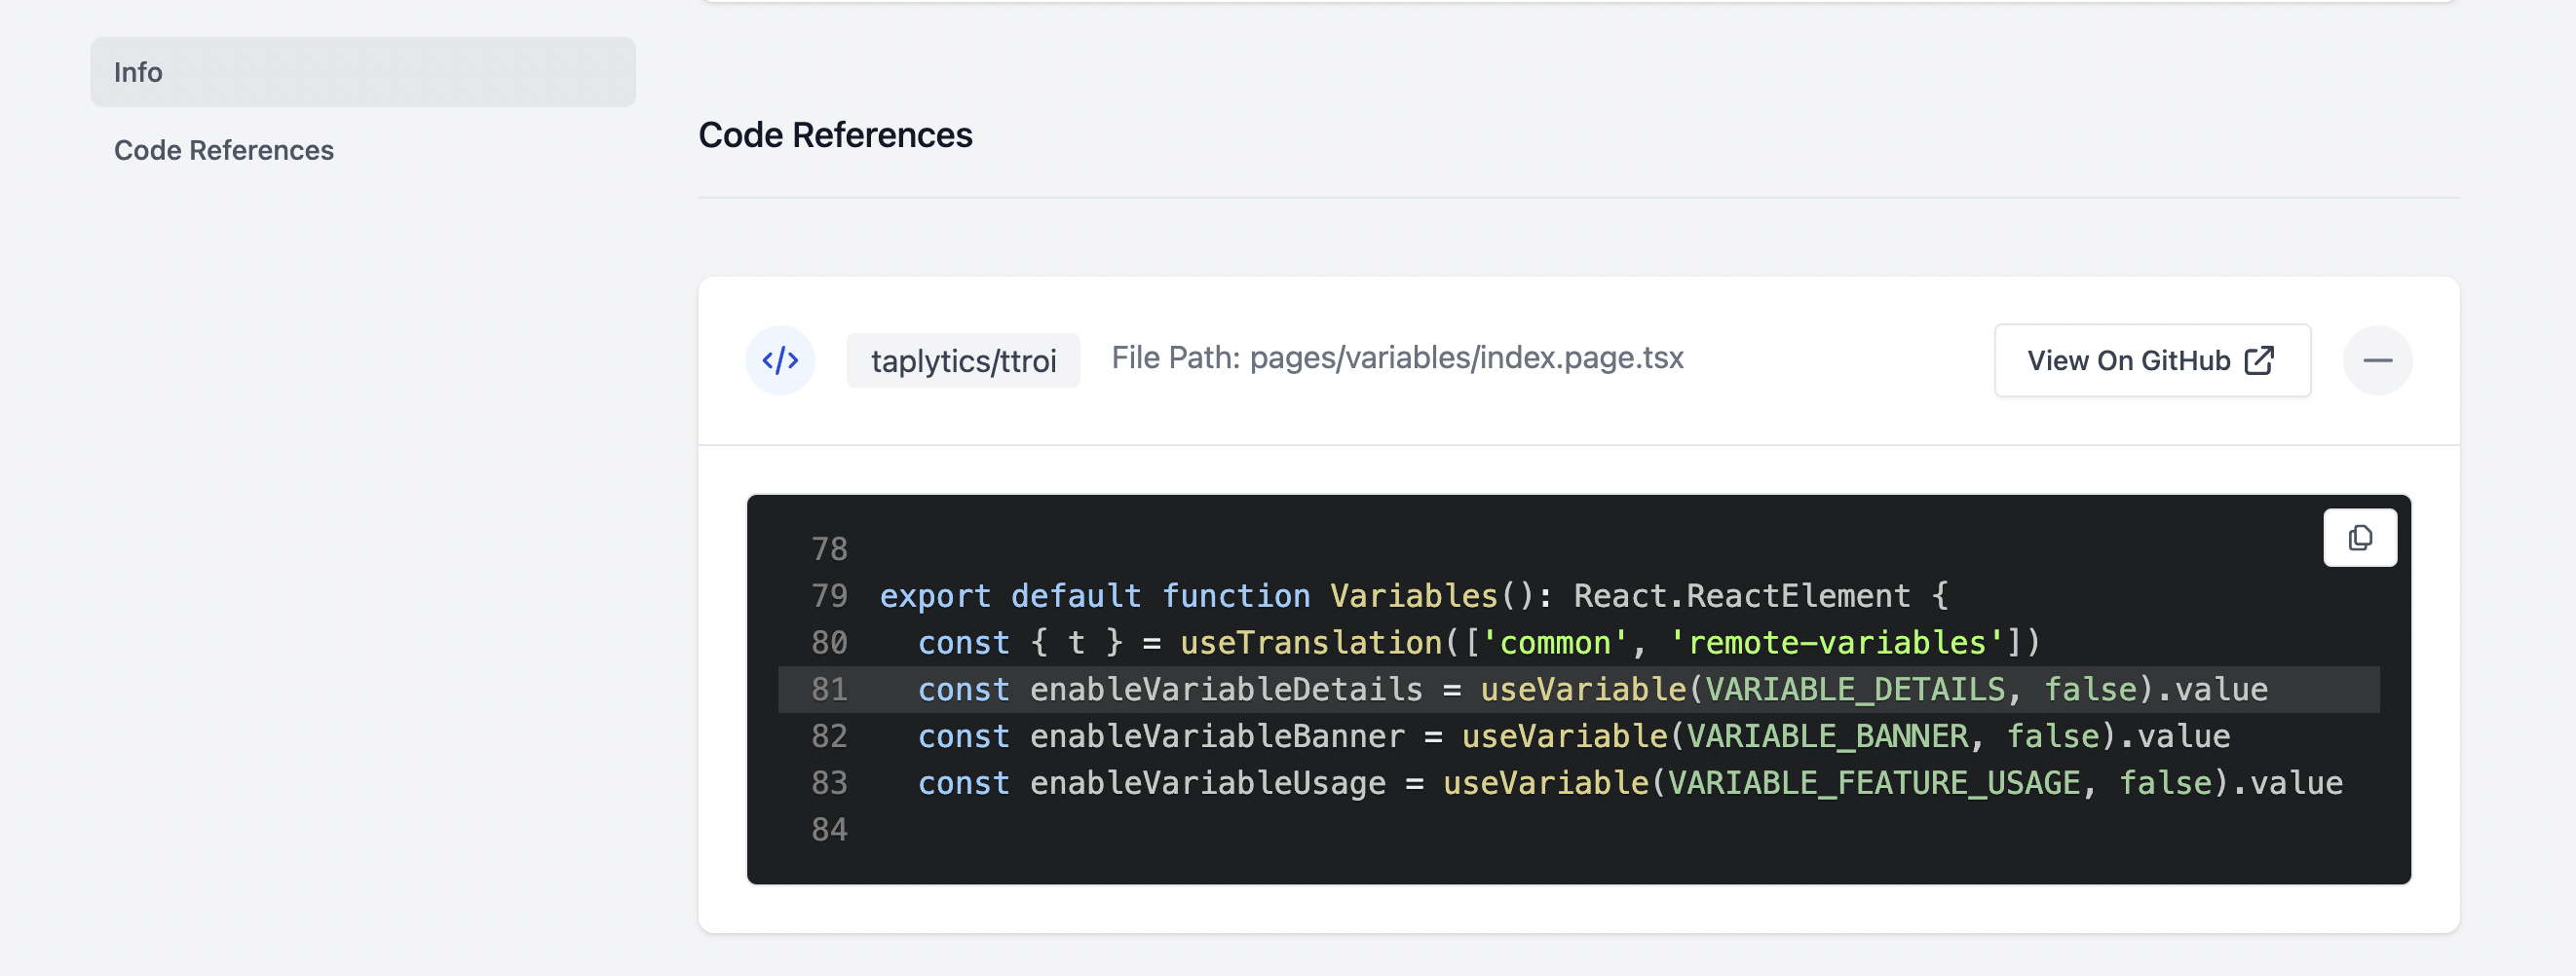
Each Code Reference also includes a link to the exact location of the referenced variable in your codebase, making it much easier to track variables. You can use code references to determine whether or not variables are being used in your code, or if they have fulfilled their lifecycle and are ready for removal. As a result, Code References are especially useful for cleaning up your code.
For more information about tracking variable usage and when to clean up flags, read Technical Debt - Cleaning up your unused flags.
To use Code References, you must create a new Actions workflow in your GitHub repository in the .github/workflows directory. Follow our documentation Action: Feature Flag Code Usages for steps to using the GitHub action. Once it is configured, you can find your Code References in the Variable Dashboard by clicking “View Info” on the desired variable.
Summary
In this guide, we explained how to organize your workflow by
- properly naming and describing the behaviour of your feature flags
- creating multiple variables within a feature for flag grouping
- linking your features to Jira tickets
- using Code References to understand variable locations
Applying the recommendations in this guide will help you manage large amounts of feature flags and maximize the organization of your team.