Sending DevCycle Data as a Custom Event to Google Analytics 4 (GTM Specific)
Transition from Google Optimize
This guide enables you to integrate DevCycle feature flags with Google Analytics 4 (GA4) for A/B testing and experimentation using Google Tag Manager (GTM). If you are a former Google Optimize customer transitioning to GA4, this guide is specific to GTM implementations.
GTM Elements: Tags, Variables, and Triggers
Below is a description of Google Tag Manager's tags, variables, and triggers. For more in-depth understanding, consult Google's official documentation.
- Tags execute specified functionality, such as sending data to GA4 or initializing DevCycle.
- Variables serve as placeholders for predefined values, which in this guide store the feature and variation data.
- Triggers are conditions that, when met, execute actions defined in Tags.
Google Tag Manager (GTM) Configuration
Step 1: Create a New Tag for DevCycle Initialization and Feature Flag Configuration Values
- Navigate to your GTM workspace and access the "Tags" section.
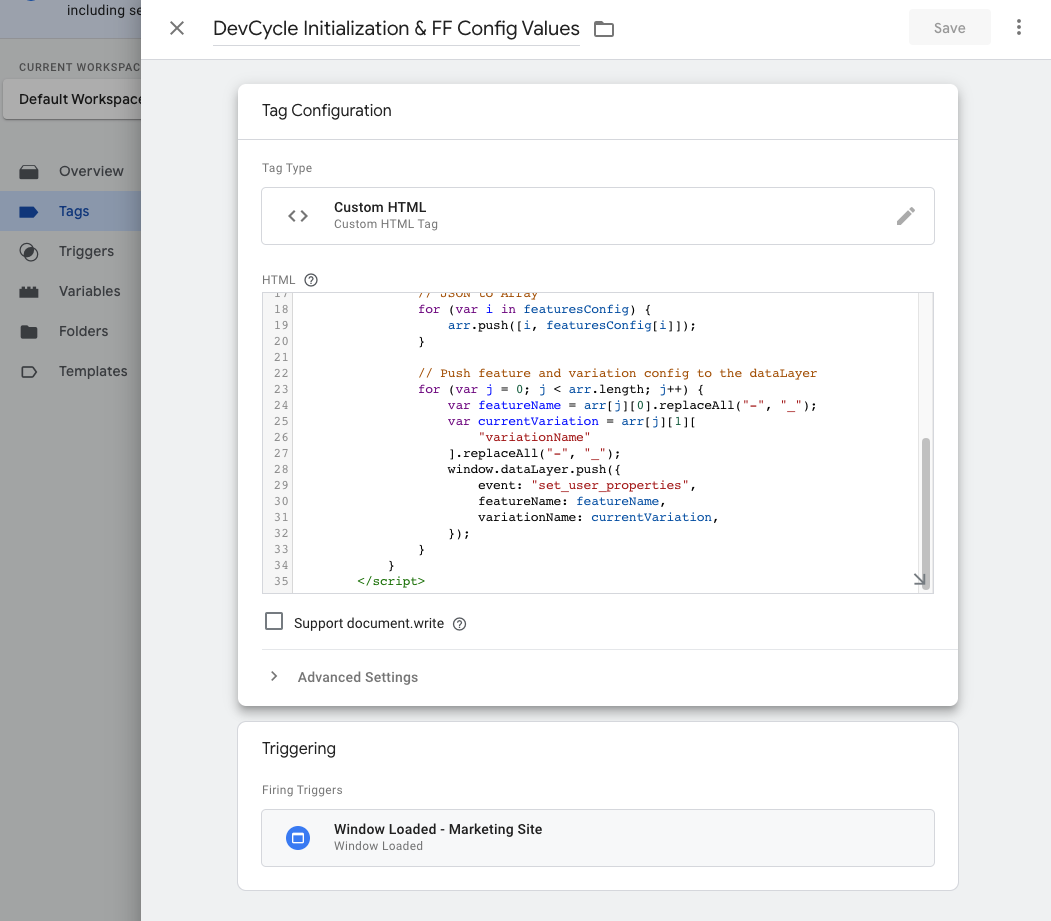
- Create a new tag and name it "DevCycle Initialization & Feature Flag Configuration Values".
- Choose "Custom HTML" for "Tag Configuration".
- Insert a script to push a custom event named
set_user_properties(or any name of your choosing) to the dataLayer with the parameters:featureName: {{featureName}}andvariation: {{variation}}. This script can be found below.
<script>
    let user = { isAnonymous: true };
    let devcycleOptions = { logLevel: "debug" };
    let devcycleClient = DevCycle.initializeDevCycle(
        "<SDK_KEY>",  // Replace with your specific DevCycle SDK Key
        user,
        devcycleOptions
    );

    devcycleClient.onClientInitialized().then(function () {
        let features = devcycleClient.allFeatures();
        pushData(features);
    });
    function pushData(featuresConfig) {
        let arr = [];

        // JSON to Array
        for (let i in featuresConfig) {
            arr.push([i, featuresConfig[i]]);
        }

        // Push to dataLayer
        for (let j = 0; j < arr.length; j++) {
            let featureName = arr[j][0].replaceAll("-", "_");
            let currentVariation = arr[j][1][
                "variationName"
            ].replaceAll("-", "_");
            window.dataLayer.push({
                event: "set_user_properties", // Can be any event name you want
                featureName: featureName,
                variationName: currentVariation,
            });
        }
    }
</script>
- For “Triggering", select the “Window Loaded” option as the firing trigger.
Step 2: Configure GTM Variables
- Navigate to the “Variable” section.
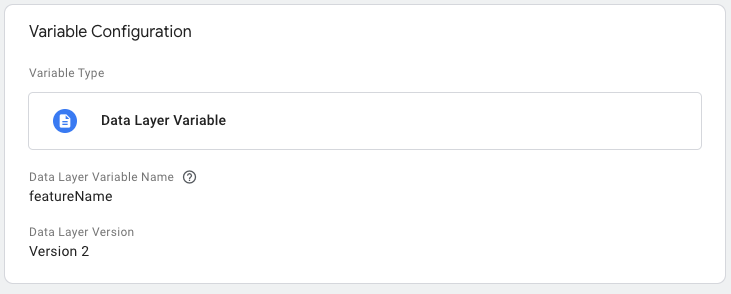
- In “User-Defined Variables", create a new variable.
- Choose “Data Layer Variable” for "Variable Type".
- Enter “featureName” for "Data Layer Variable Name".
- Repeat to create another variable and name it “variationName".

Step 3: Create Tag to Send Custom Events
Option 1: Setup via Google Tag
- In your GTM workspace, navigate to "Tags" and create a new one.
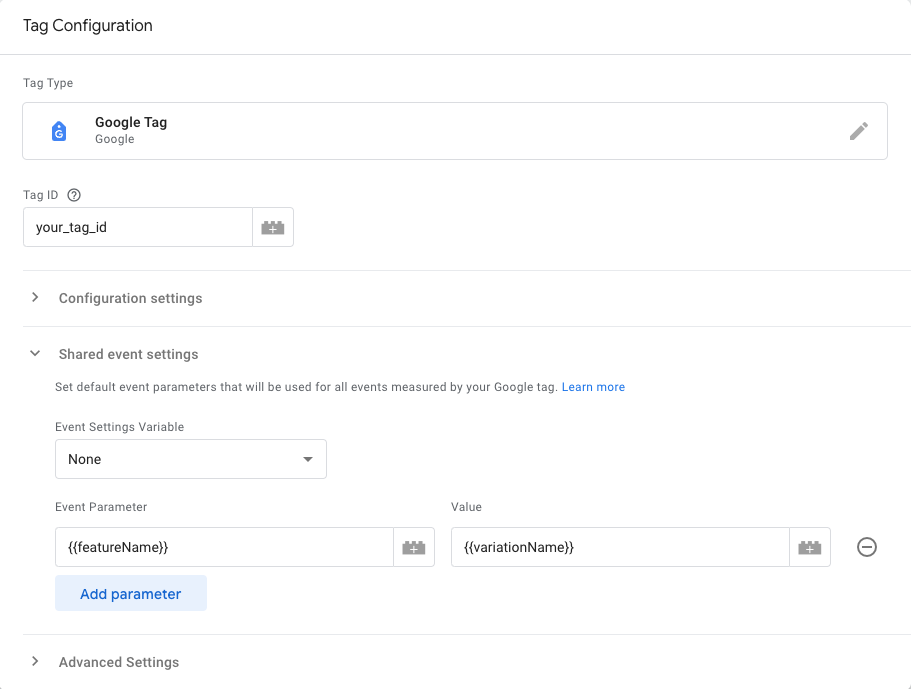
- Name it "GA4_Custom_User_Properties".
- Select "Google Tag" for "Tag Configuration".
- Provide your Tag ID for your Google Analytics instance.
- Under "Shared event settings", add a new Parameter with the
featureNamevariable you created as the "Event Parameter", and yourvariationNamevariable as the "value".
Option 2: Send Custom Events to Google Analytics 4
- In your GTM workspace, navigate to "Tags" and create a new one.
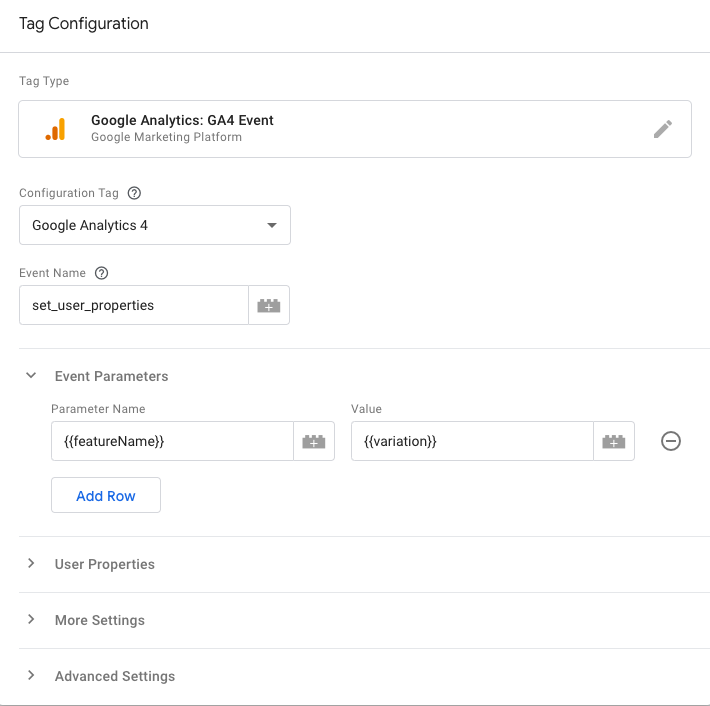
- Name it "GA4_Custom_User_Properties".
- Select "GA4 Event" for "Tag Configuration."
- In "Configuration Tag", choose your existing GA4 Configuration Tag.
- Input
set_user_propertiesfor "Event Name" (or the event name you chose).
Step 4: Define Trigger for the new Tag
- Within the tag you just setup, create a new "Firing Trigger" in "Triggering".
- Create a new trigger and set the trigger type to "Custom Event" or to another trigger of your choice.
- Name the event (if applicable) as
set_user_properties(Or the event name you chose in your custom HTML).
Step 5: Publish Changes
Before hitting "Submit", it's crucial to validate that your configurations are working as intended. Use GTM's "Preview" mode for this.
How to Validate your setup with GTM's Preview Mode
- Click on "Preview" at the top right of the GTM interface.
- This will open a new browser tab, where you'll navigate to your website.
- Perform actions that should trigger the tag you've configured.
- Check the GTM Preview pane that appears at the bottom of your website. It should show the tags that are fired upon your actions.
- Specifically, confirm that your DevCycle feature and variation data is correctly passed to GA4 tags.
When you've confirmed that your data is being passed in correctly, publish your changes by clicking on "Submit"!
Google Analytics 4 Configuration
Reporting in Google Analytics 4
- Navigate to "Reports" > "Library" > "New Report".
- Choose the metric for analysis under "Event Metric".
- Select the feature property under "Dimension," e.g.,
DevCycle_featureNameA.- If the dimension doesn't exist:
- Go to "Admin" > "Custom definitions" > "Create custom dimension".
- Set the scope to
Eventand name the event parameter according to your feature.
- If the dimension doesn't exist:
Contributing to DevCycle or Creating a New Integration:
DevCycle's tools and integrations are open source and can be found on the DevCycle GitHub repository.
For new integrations, refer to DevCycle's Management API and DevCycle Bucketing API.