Feature Opt-In
Feature Opt-In provides the ability to make any feature released via DevCycle have a self-serve way to enable it for end users. This all happens through a simple iFrame that can be implemented on your website, that is powered by DevCycle.
This means that if you are looking to run a beta program, but don't want to manually manage access to beta features you can just add them to the Feature Opt-In widget and your users can toggle them on or off as they wish.
Feature Opt-In isn't limited to beta program management though, it can be leveraged to give your users power to customize their experience without needing to build your own way of managing user preferences. In this way Feature Opt-In could be used for individual preference management, giving QA teams a debugging dashboard where they could override features and much more.
If you have an idea for this widget but don't know how to execute it, just reach out to [email protected] and we'd be happy to help you figure out the best path forward.
Implementation
Feature Opt-in allows end users of your product to opt-in to a list of eligible features through a pre-built widget that can be implemented in your app and website with one line of code. Your team has the ability to customize the look & feel of this widget to your company's colour profile and logo.
This article explains how to implement our Feature Opt-in functionality on your app or website.
Requirements
To get started with the Feature Opt-In functionality all you need are running features in DevCycle and a page that you can install the iFrame into.
Getting Started
The Feature Opt-In functionality can be turned on from the Organization Settings page.
Once in your Organization Settings, navigate to the "Feature Opt-In" page:
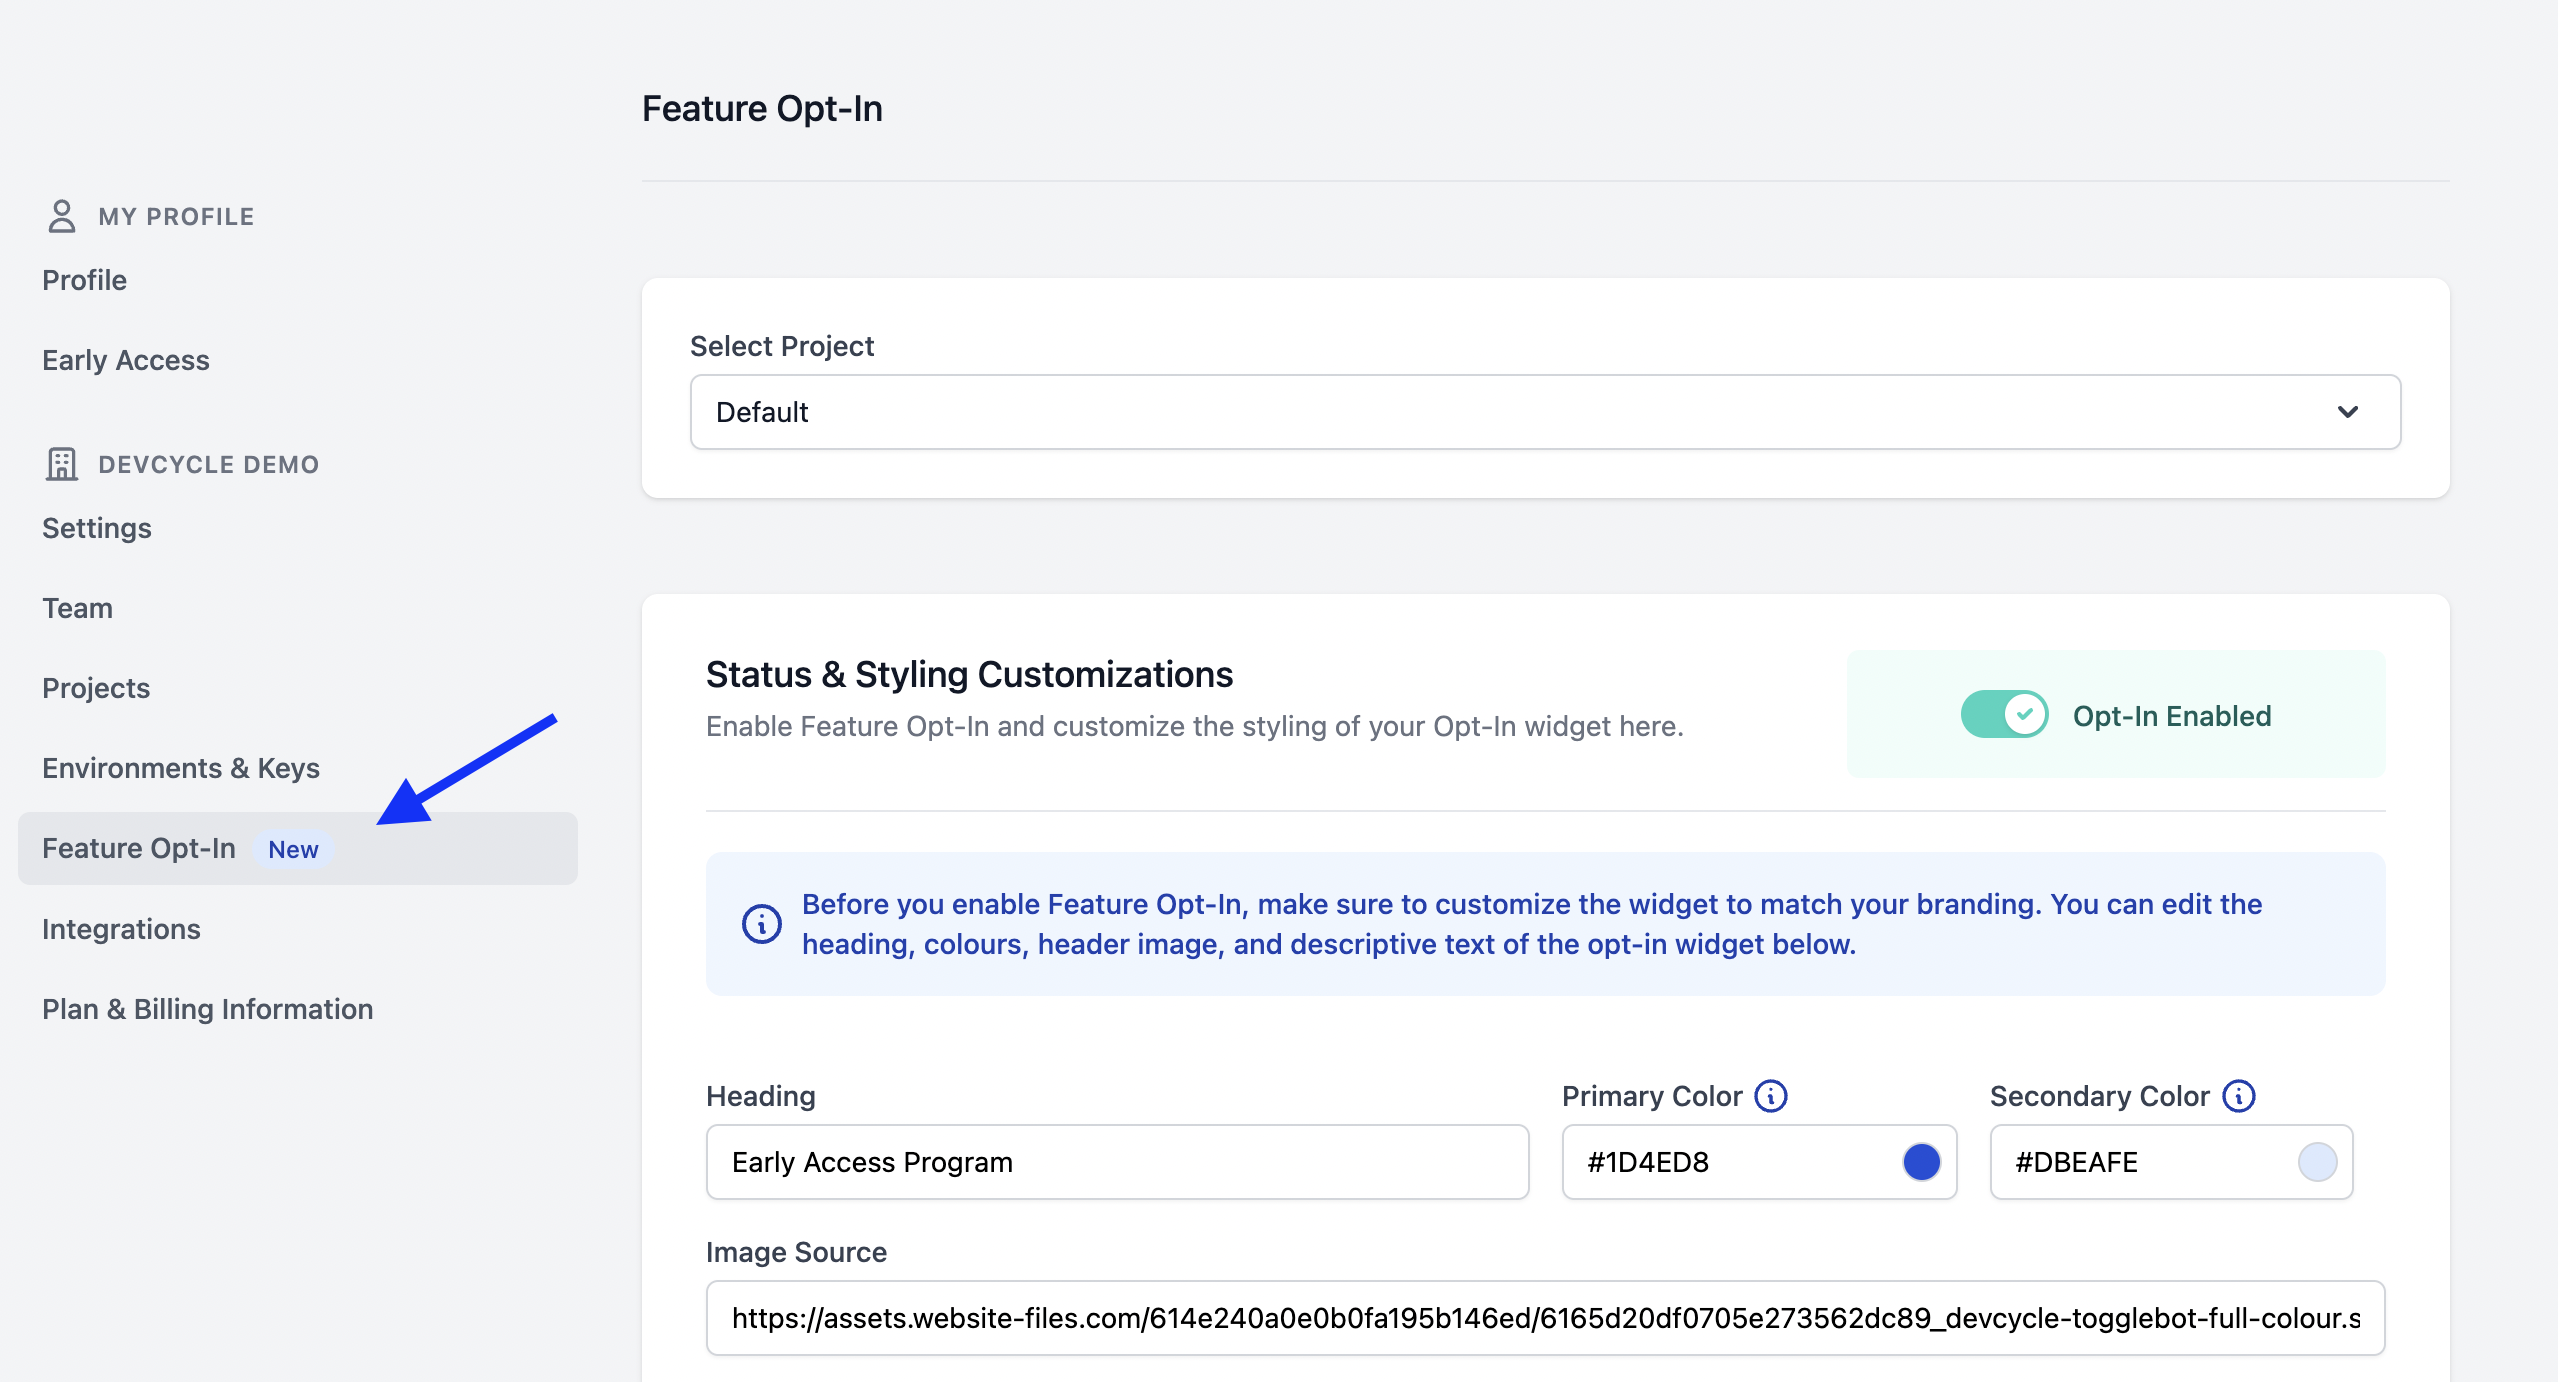
Feature Opt-In is first enabled at the project level. It needs to be enabled manually because it leverages EdgeDB to manage a user's opt-in state. This means that enabling Feature Opt-In on a project can impact billing for your account. For more information on EdgeDB pricing visit our pricing page.
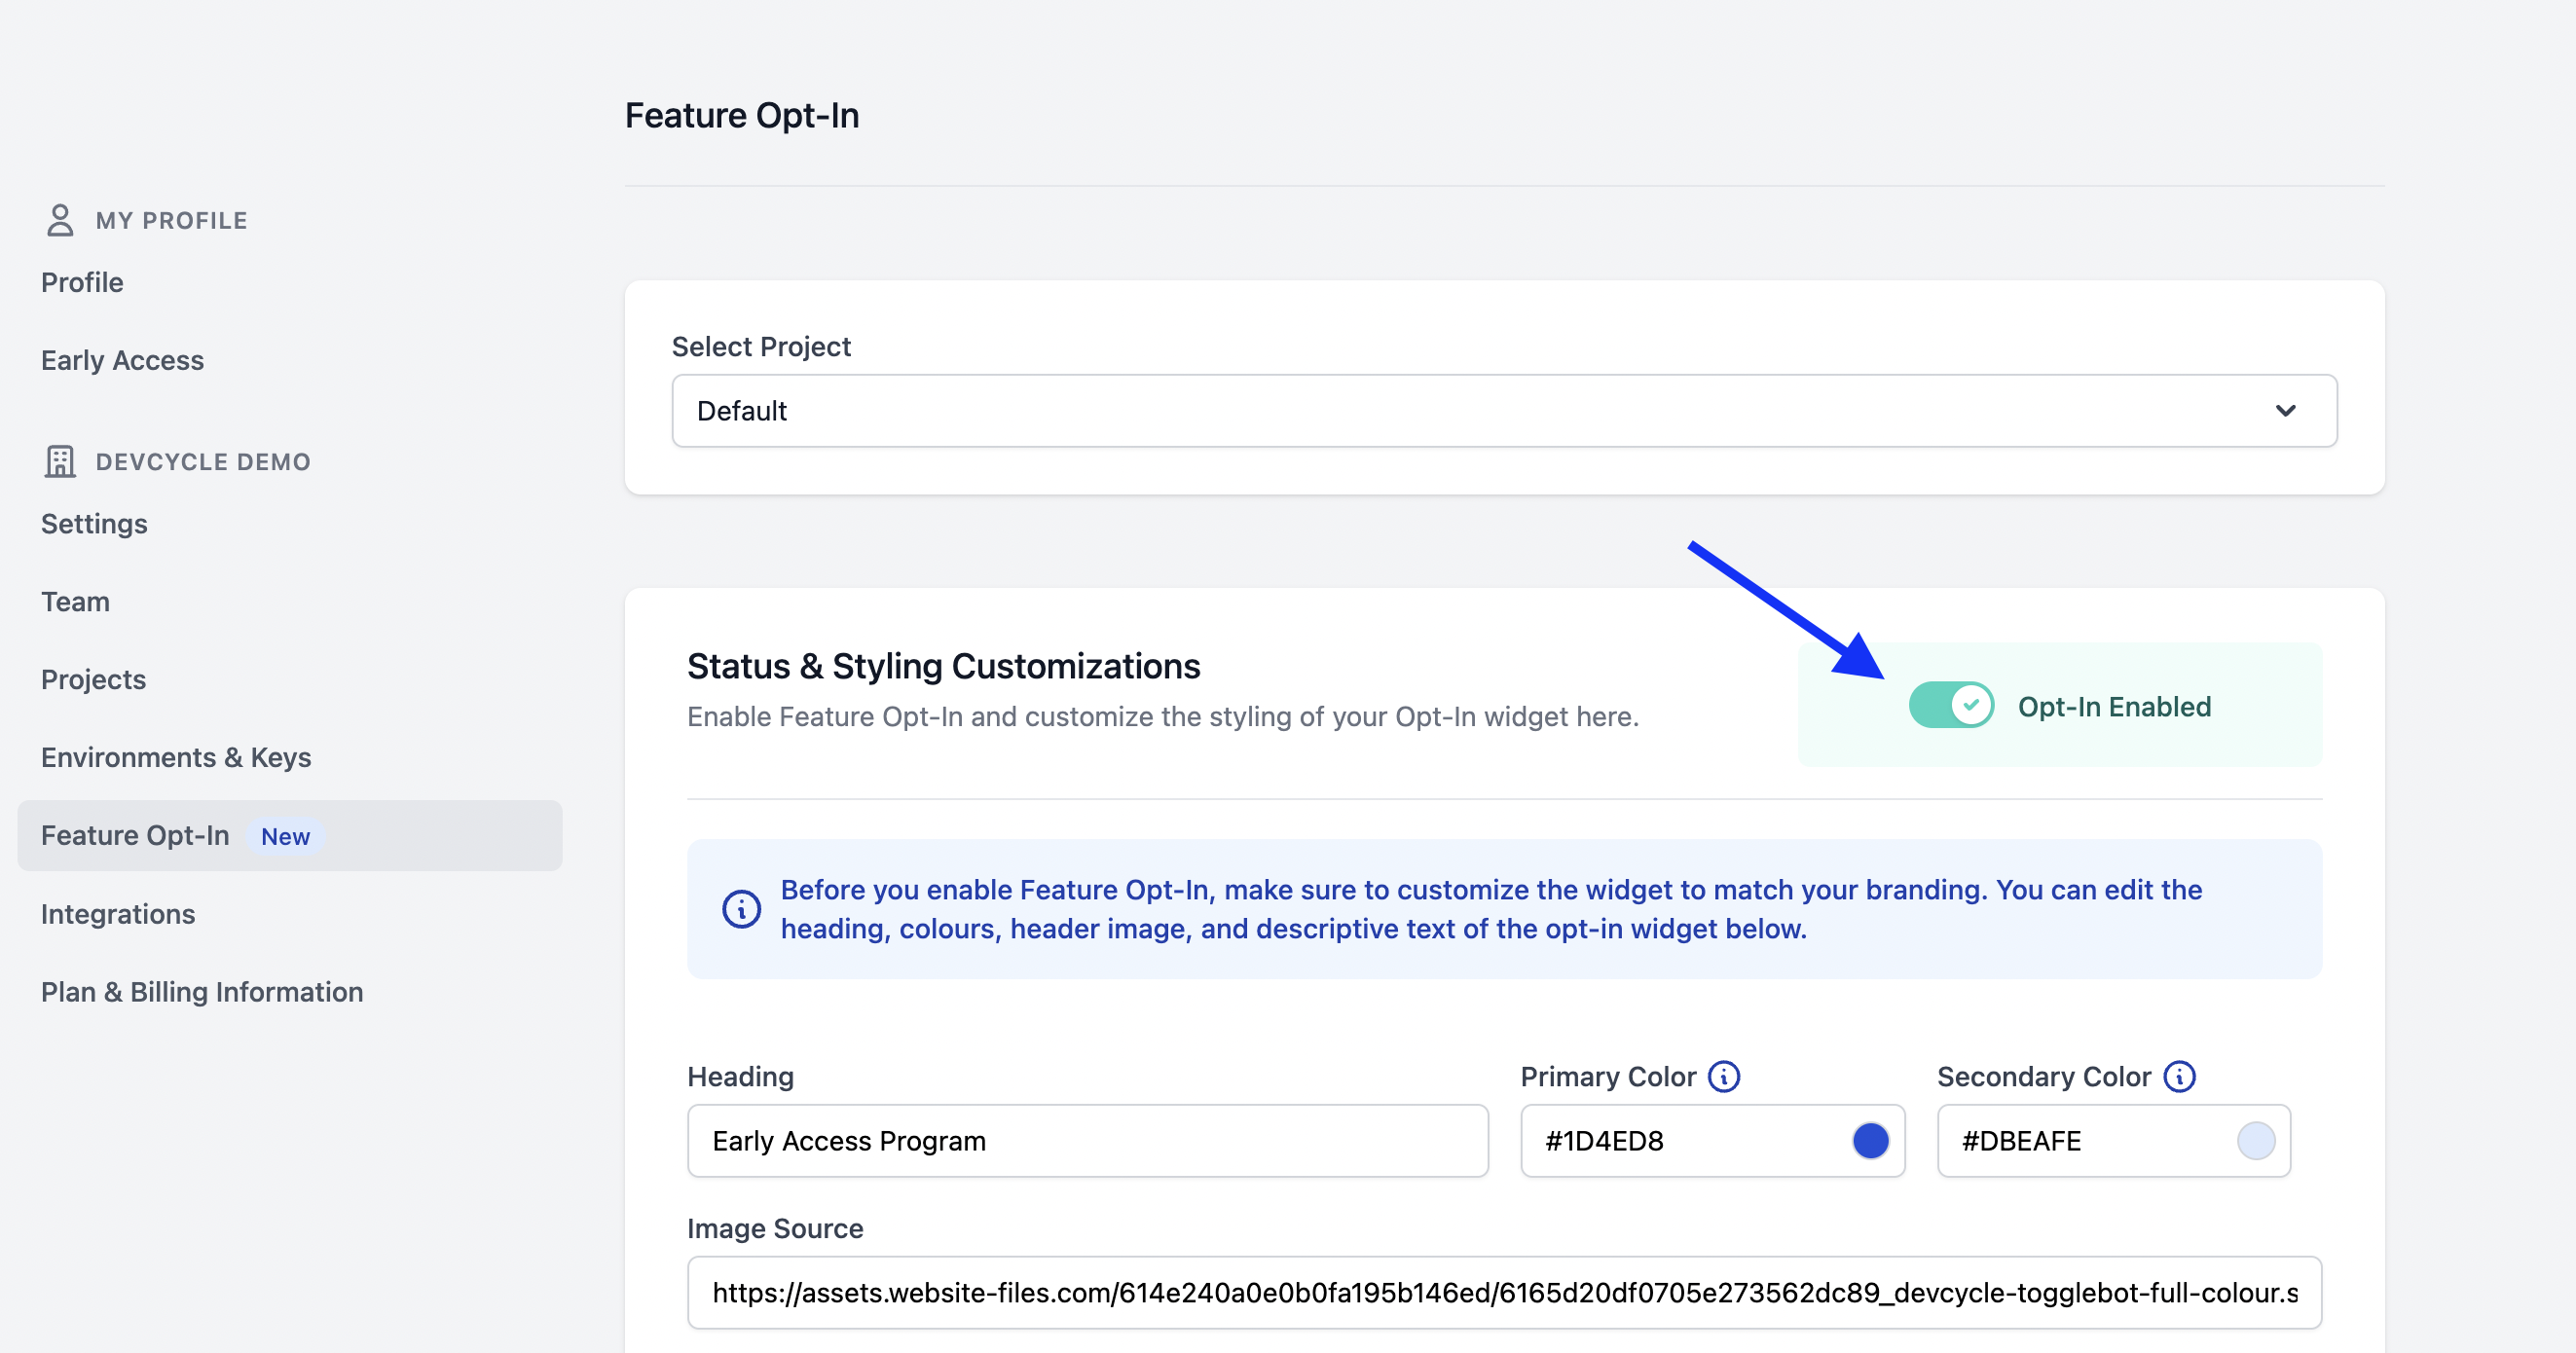
To enable Feature Opt-In select the desired project and toggle to "Opt-In Enabled".
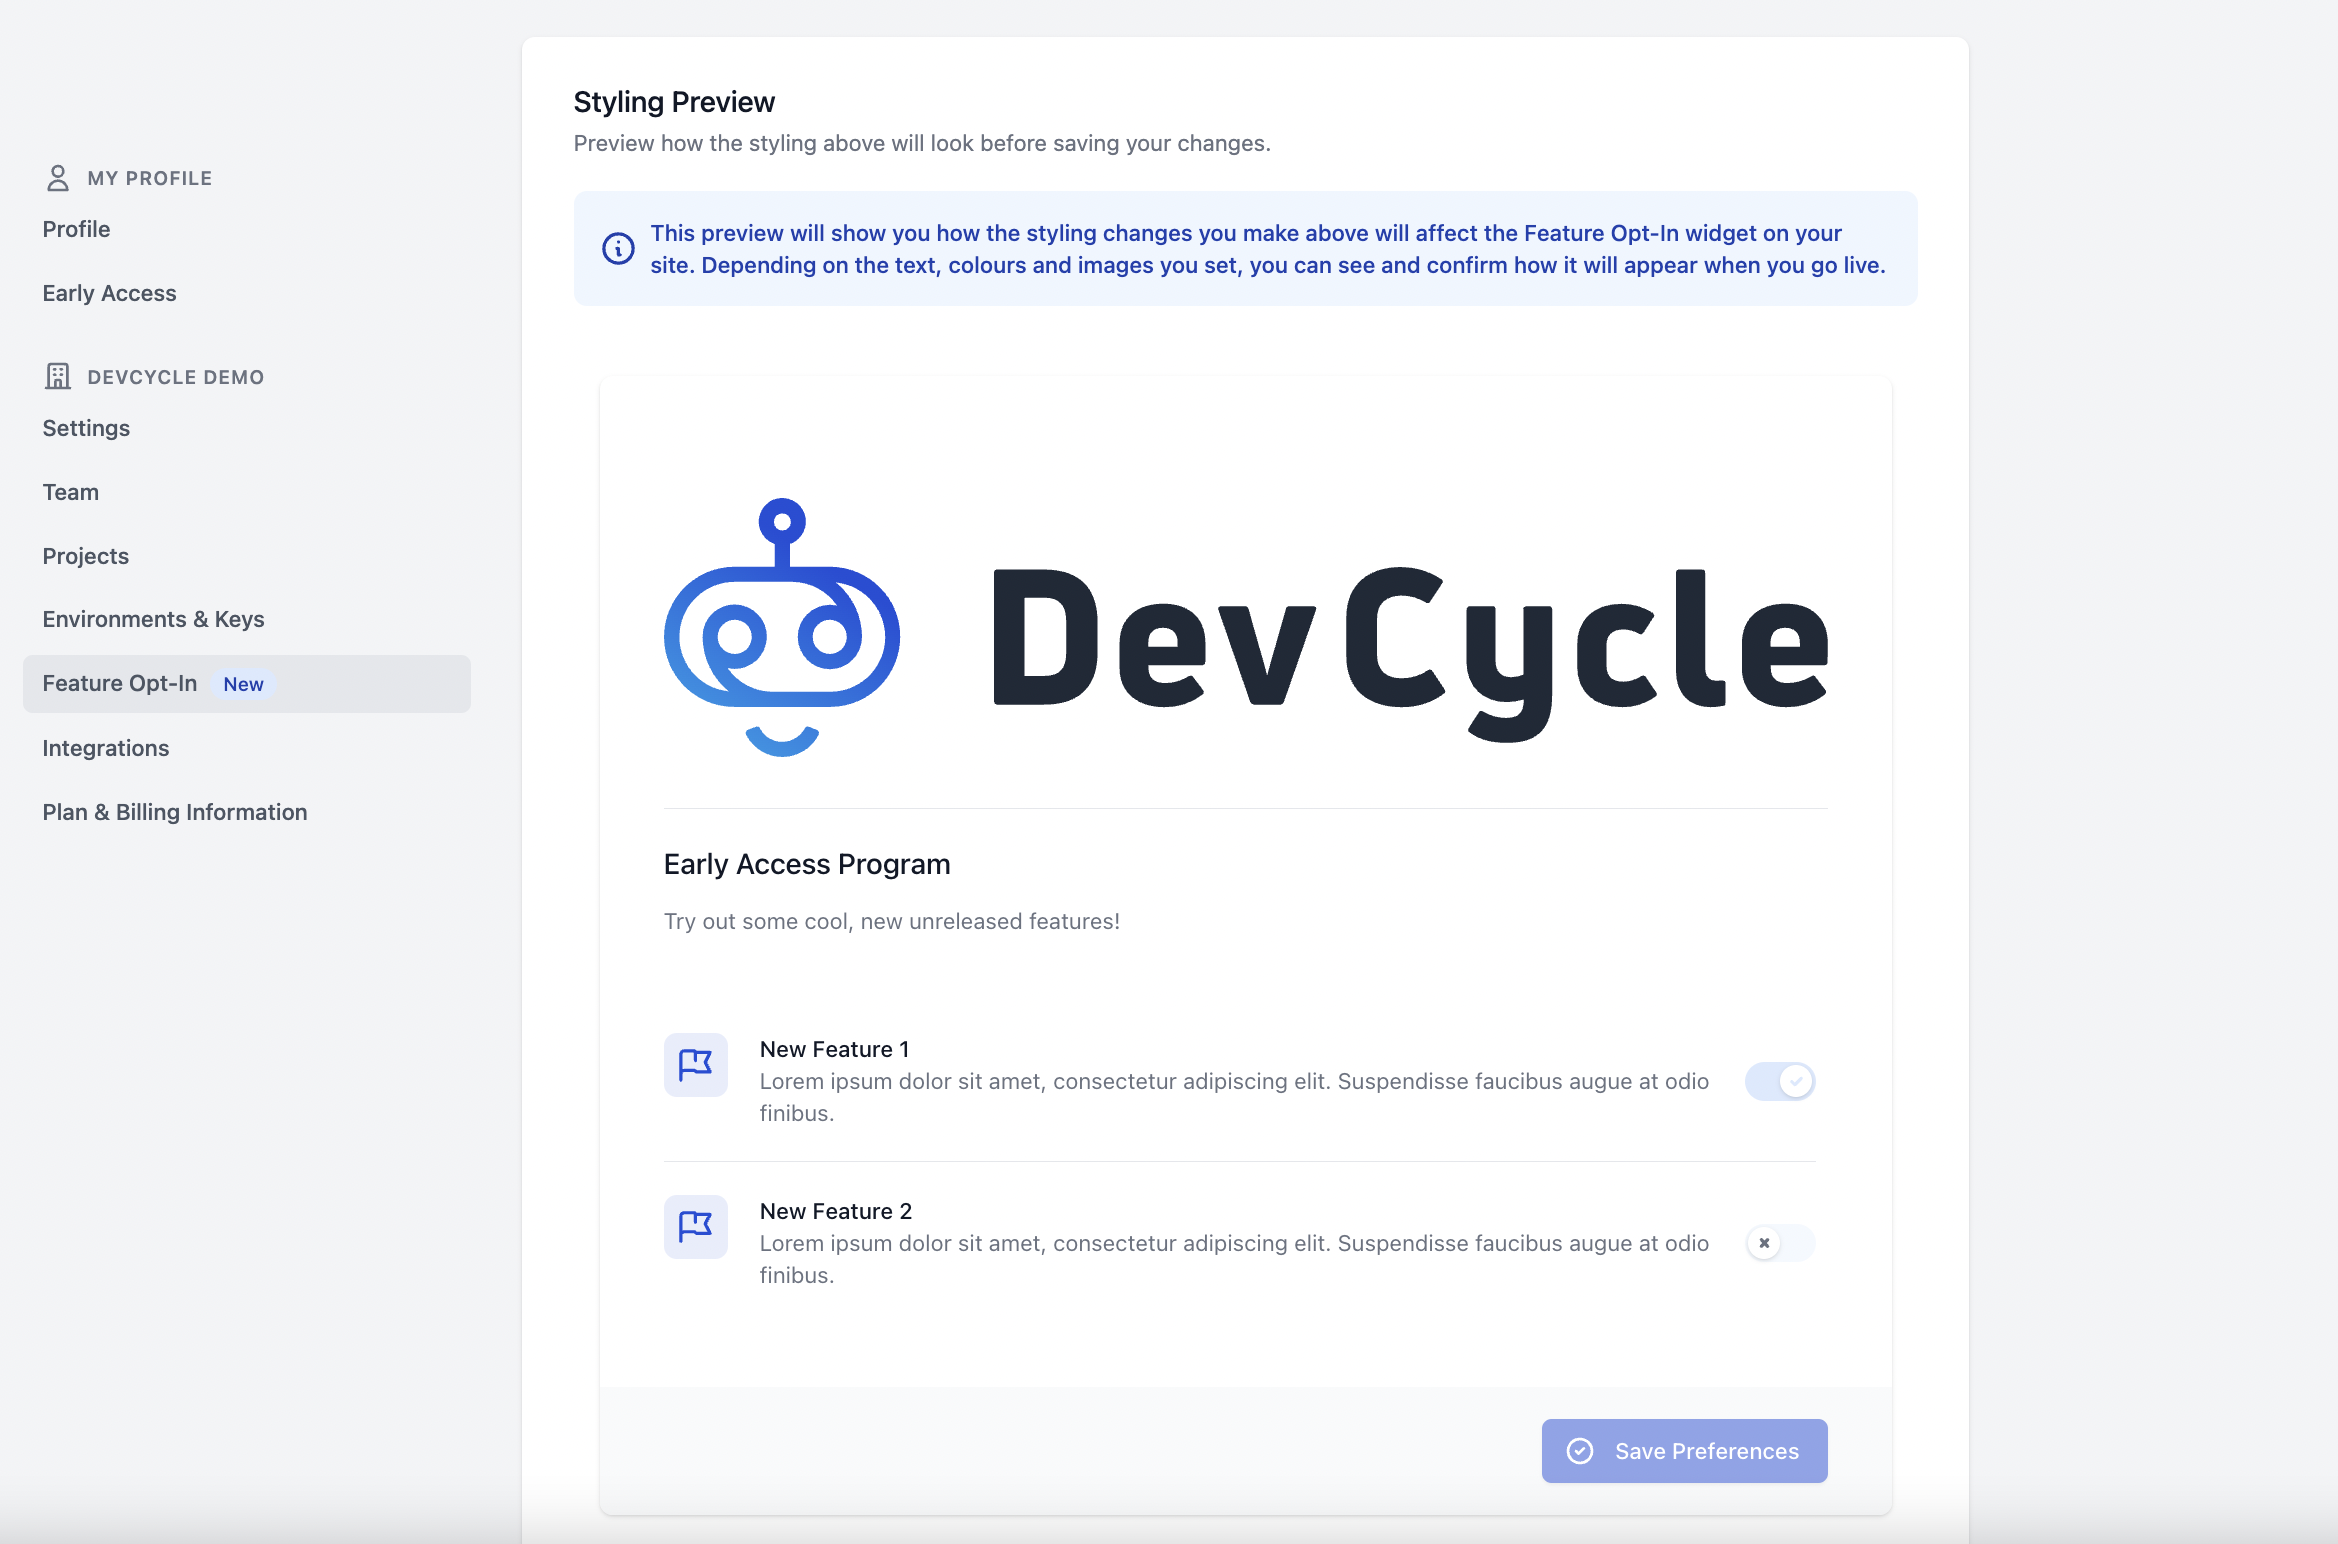
From here, you can customize the heading, colours, logo, and descriptive text of the Feature Opt-In widget. Under the customization settings, there is a preview of the Opt-In widget where you can preview what the widget will look like based on the settings you choose.
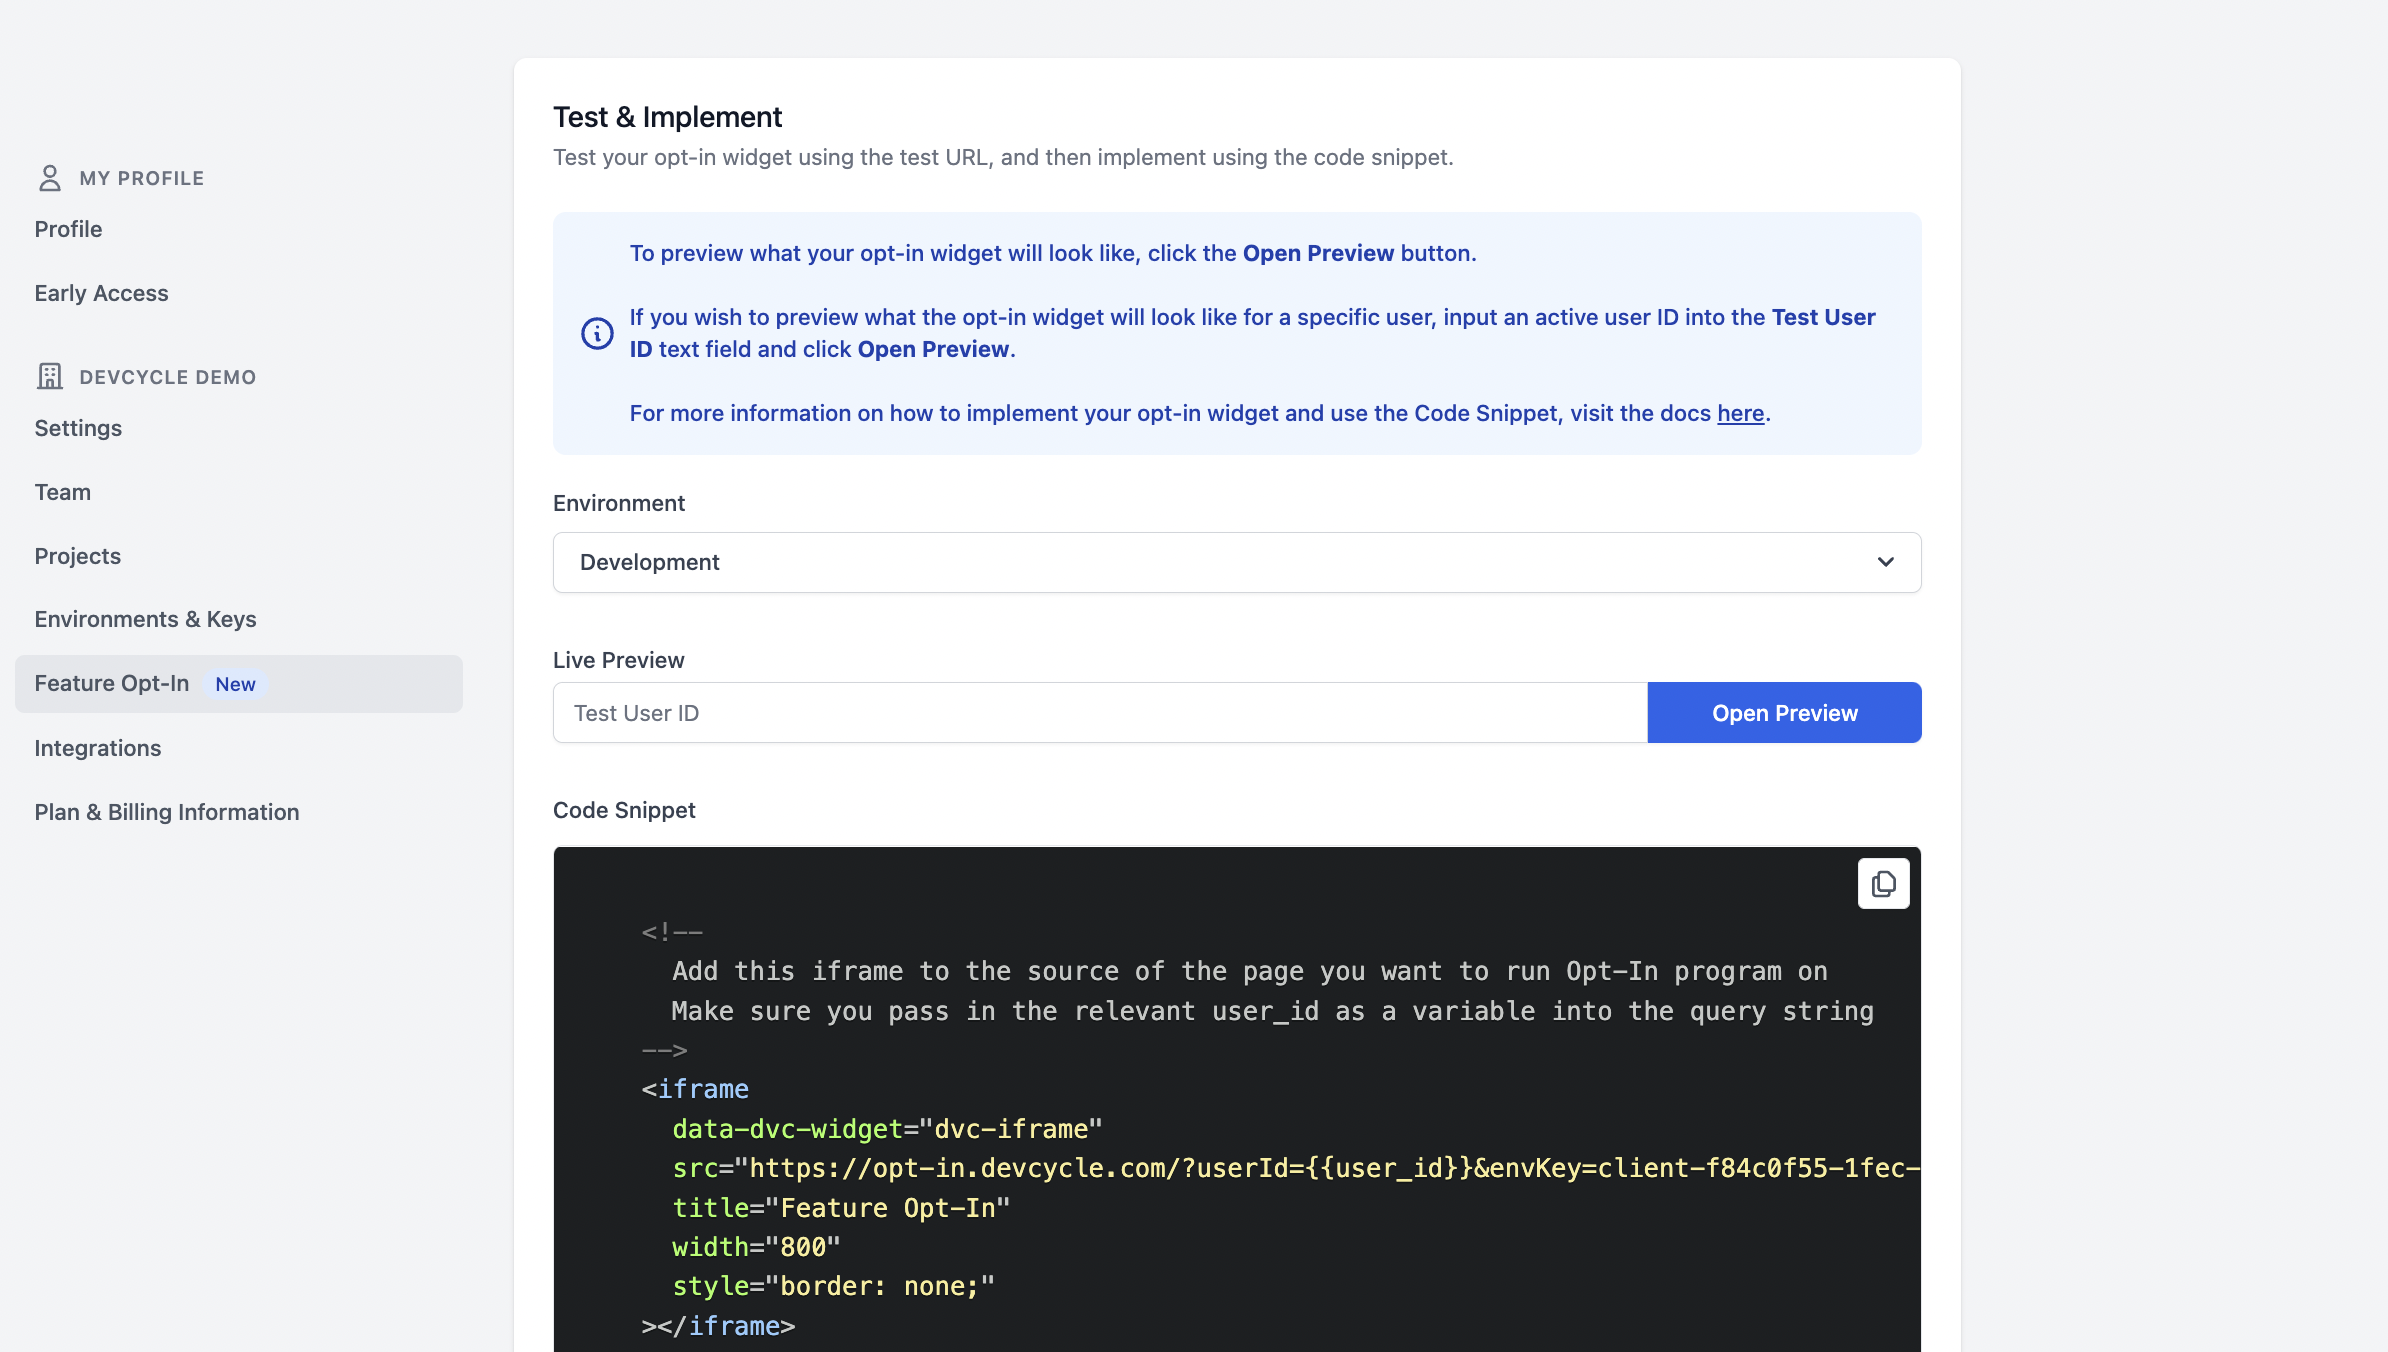
Below the customization options and styling preview is the iFrame code snippet and a tool to test the widget with different user IDs. Select the environment you would like to test or implement in the dropdown and insert any user ID to validate what the widget will look like for a given user by clicking "Open Preview".
This code snippet is initially presented in simple HTML format, but React and Angular alternatives are available via the "Frontend framework" dropdown above the code snippet.
The two most important parts of the iFrame code are the environment key and user ID. Make sure that you are setting the right key for the environment the widget will be displayed in, and ensure you always pass the relevant user ID for the user that is interacting with the widget.
Custom Widget
Some users prefer to create a custom Opt-In widget, connected to our Management API. To ensure that a user's experience is adjusted in realtime to reflect the opt-in or opt-out of a feature, trigger the following code once the opt-in state has been successfully sent to the API.
window.postMessage({ type: "DVC.optIn.saved" }, "*")
Select Features to be Eligible for Feature Opt-In
To make sure only the right features are added to the Feature Opt-In widget you need to explicitly enable Opt-In on each feature that you want to show up in the widget.
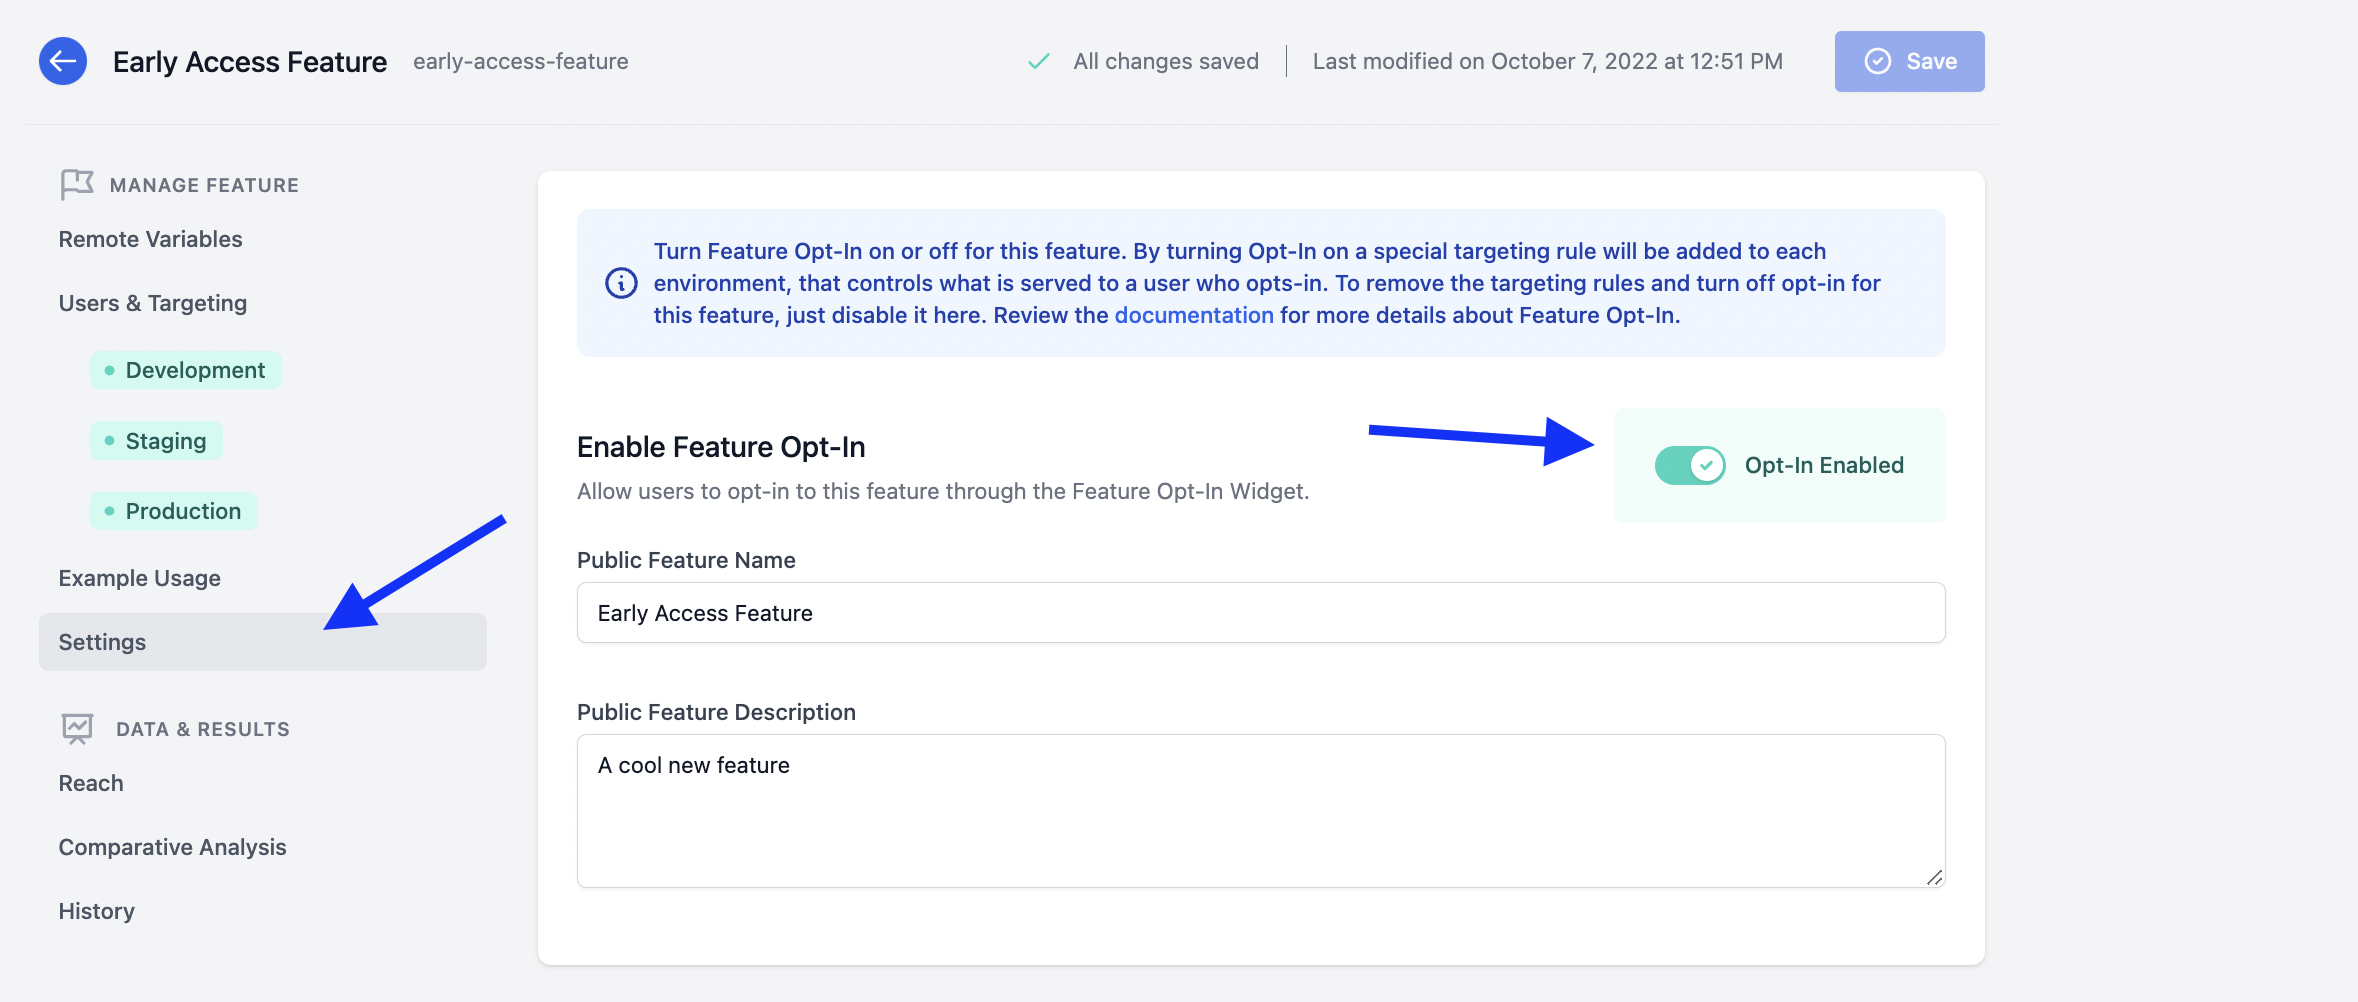
Make a specific feature eligible for Opt-in by enabling Feature Opt-In under the feature's settings section.
Targeting
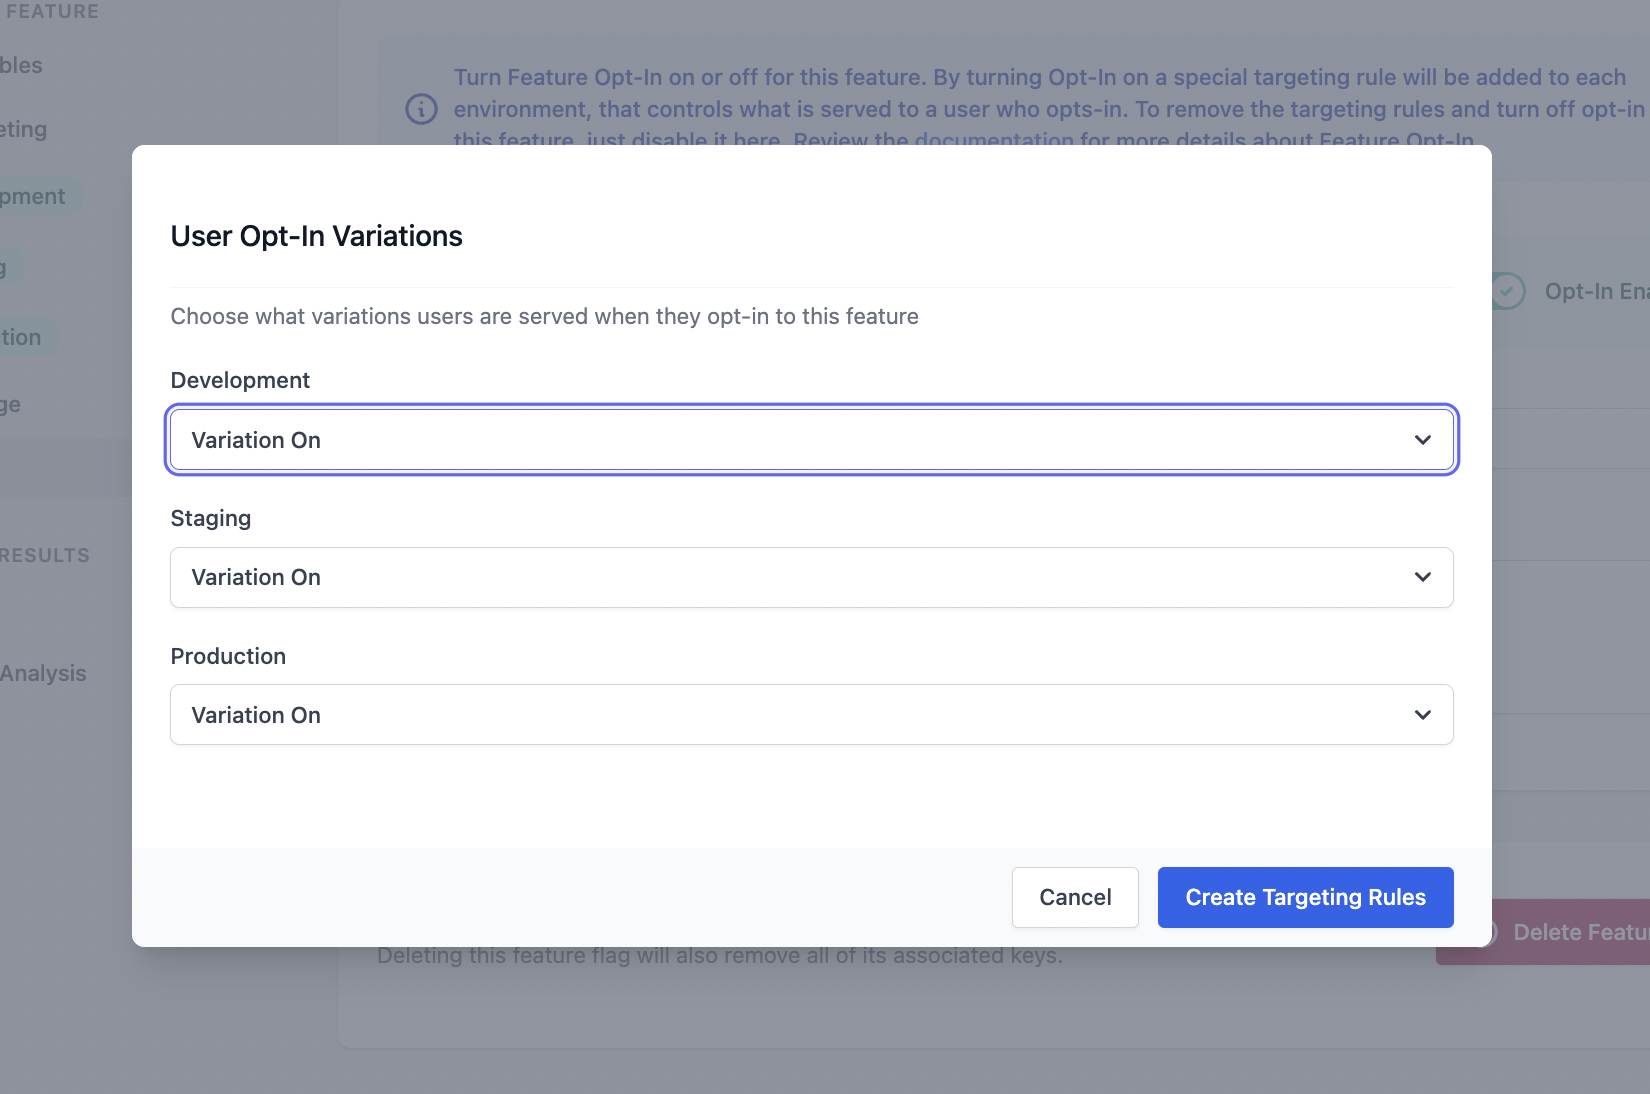
After enabling a feature for Opt-In a special Opt In targeting rule will now appear in each environment. To make sure everything is set up correctly, you will be presented with a modal to select which variations a user should receive given they toggle a feature on in the Opt-In widget for each environment. Once you dismiss the modal you can scroll up to see the new targeting rules at the top of each environment.
This special targeting rule allows teams to be explicit about what happens when a user enables a feature for themselves. It also allows you to set overrides if you would like, based on the priority order of targeting rules and where the Opt-In rule sits.
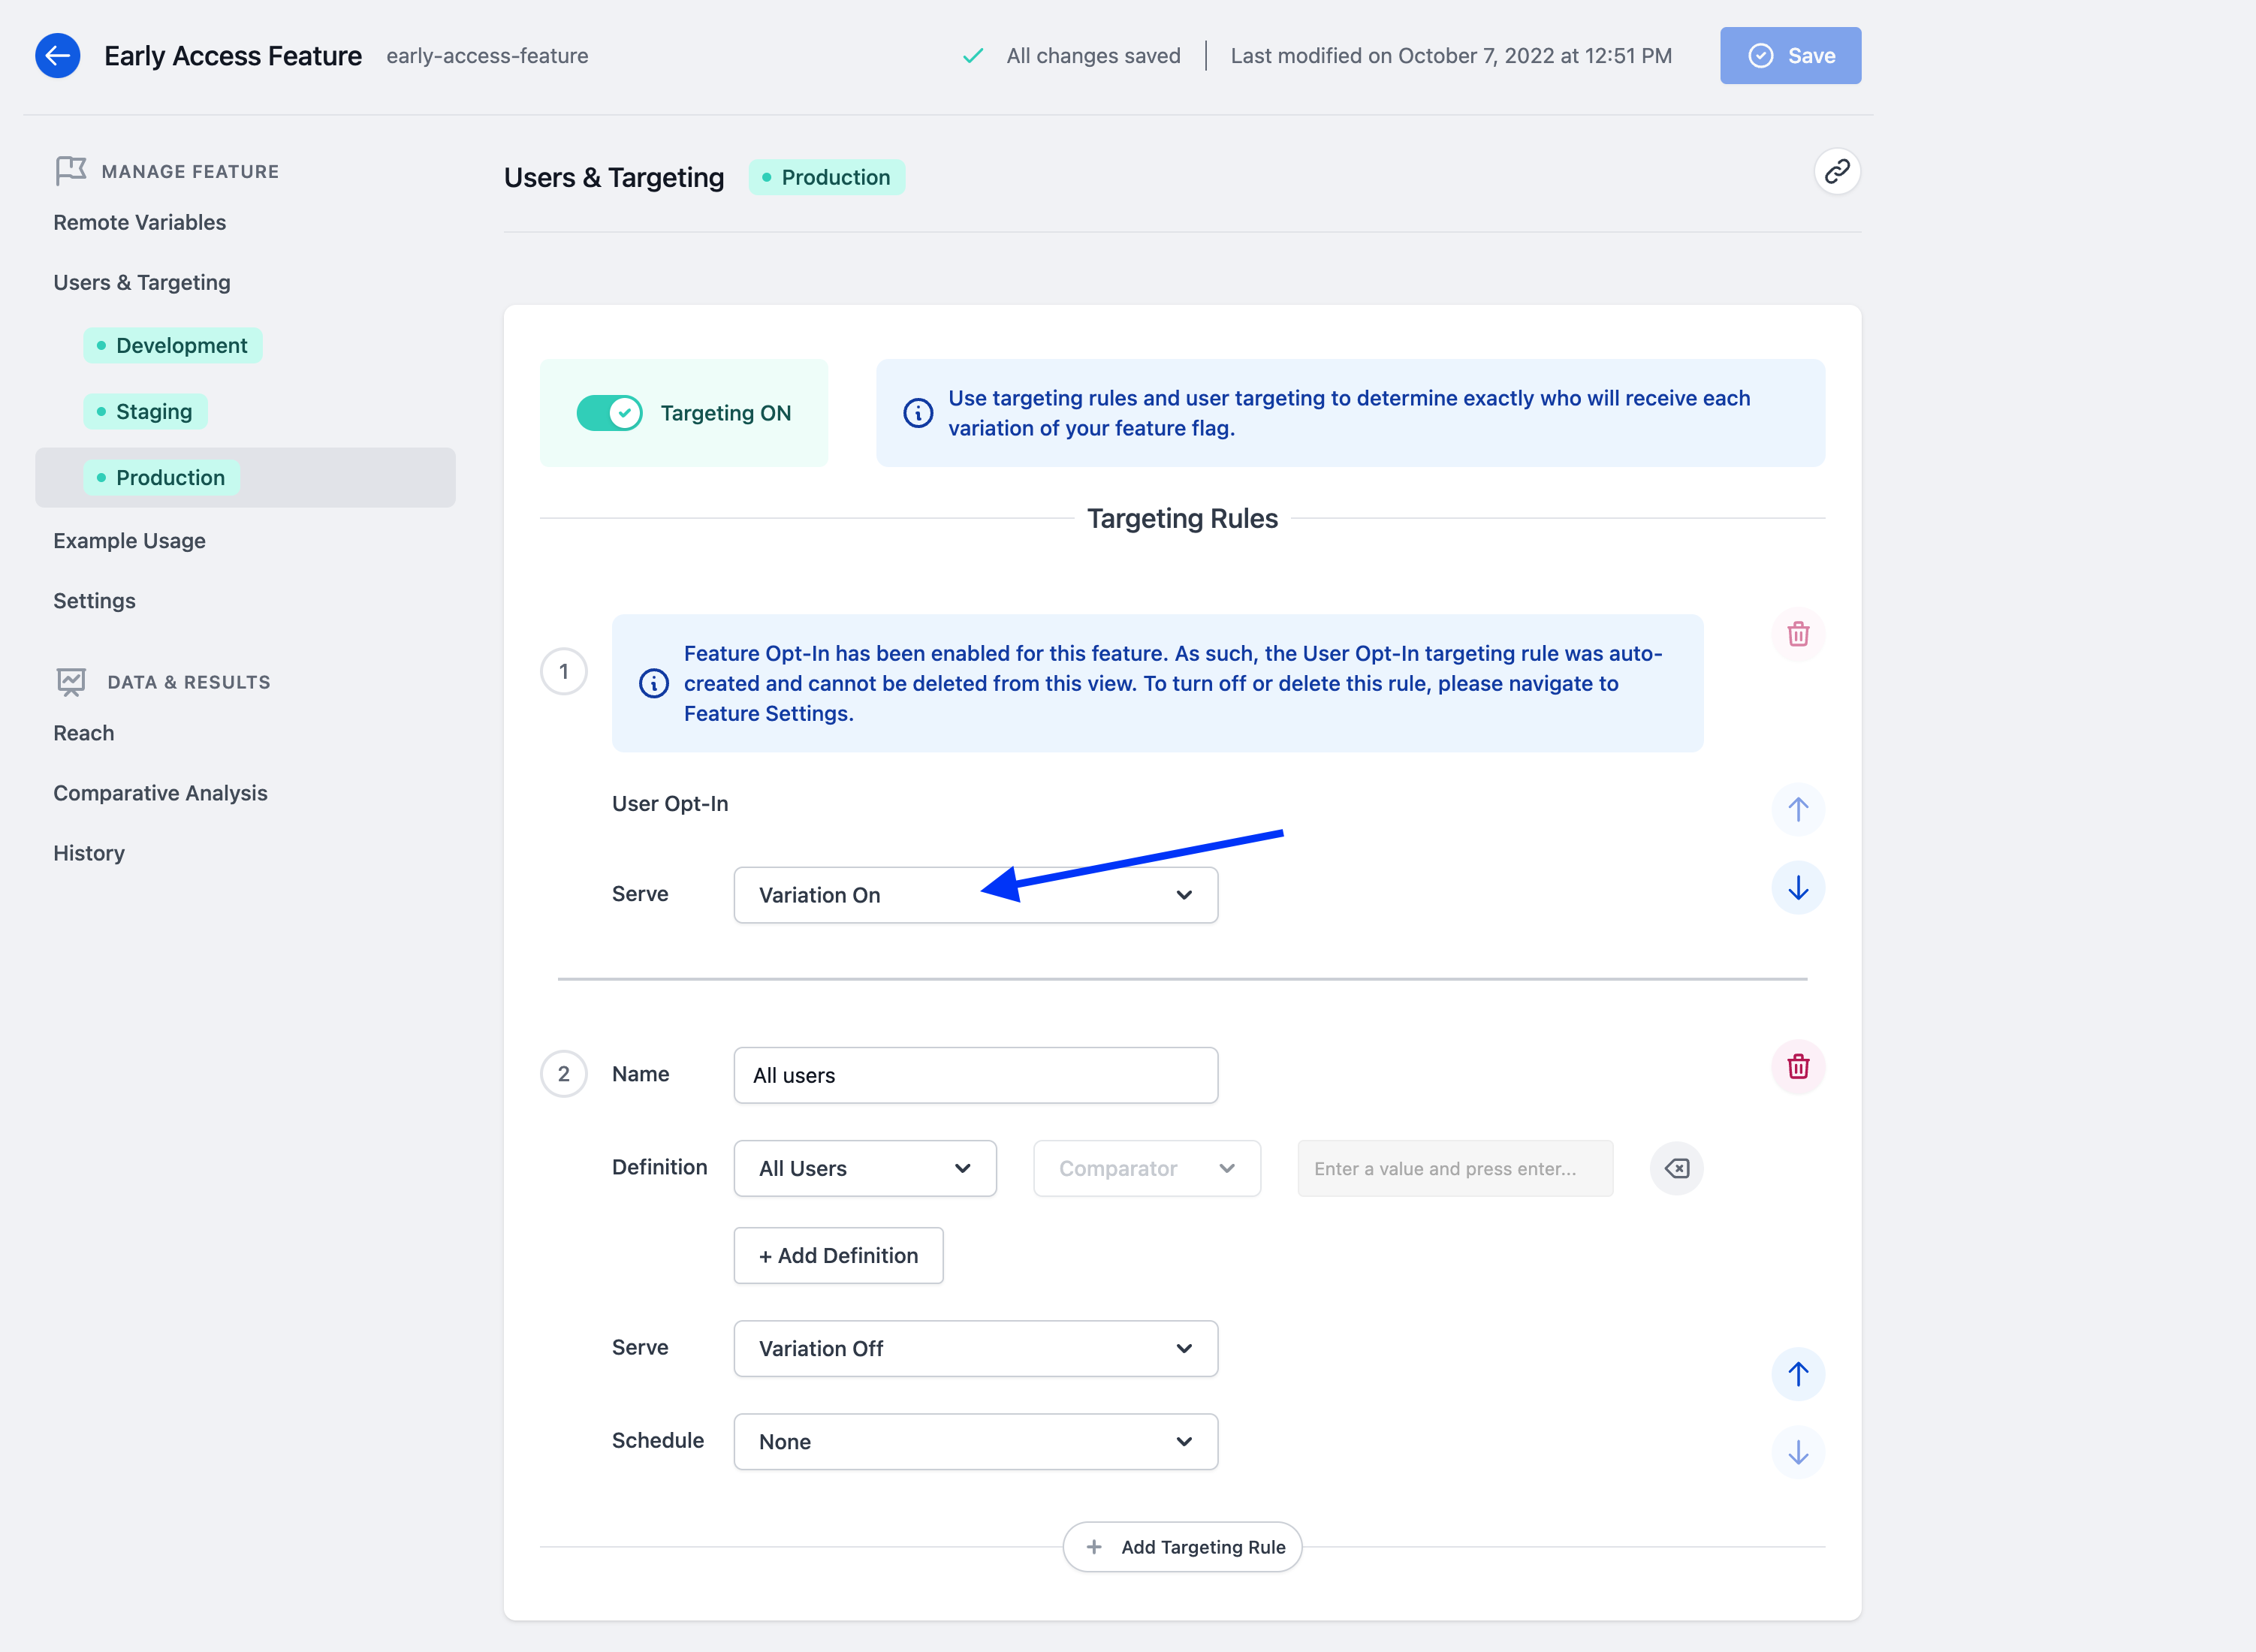
When Opt-In is enabled for a feature the special targeting rules cannot be deleted, to remove the Opt-In targeting rules you must disable Opt-In entirely for the feature. This will automatically remove all of the special targeting rules.
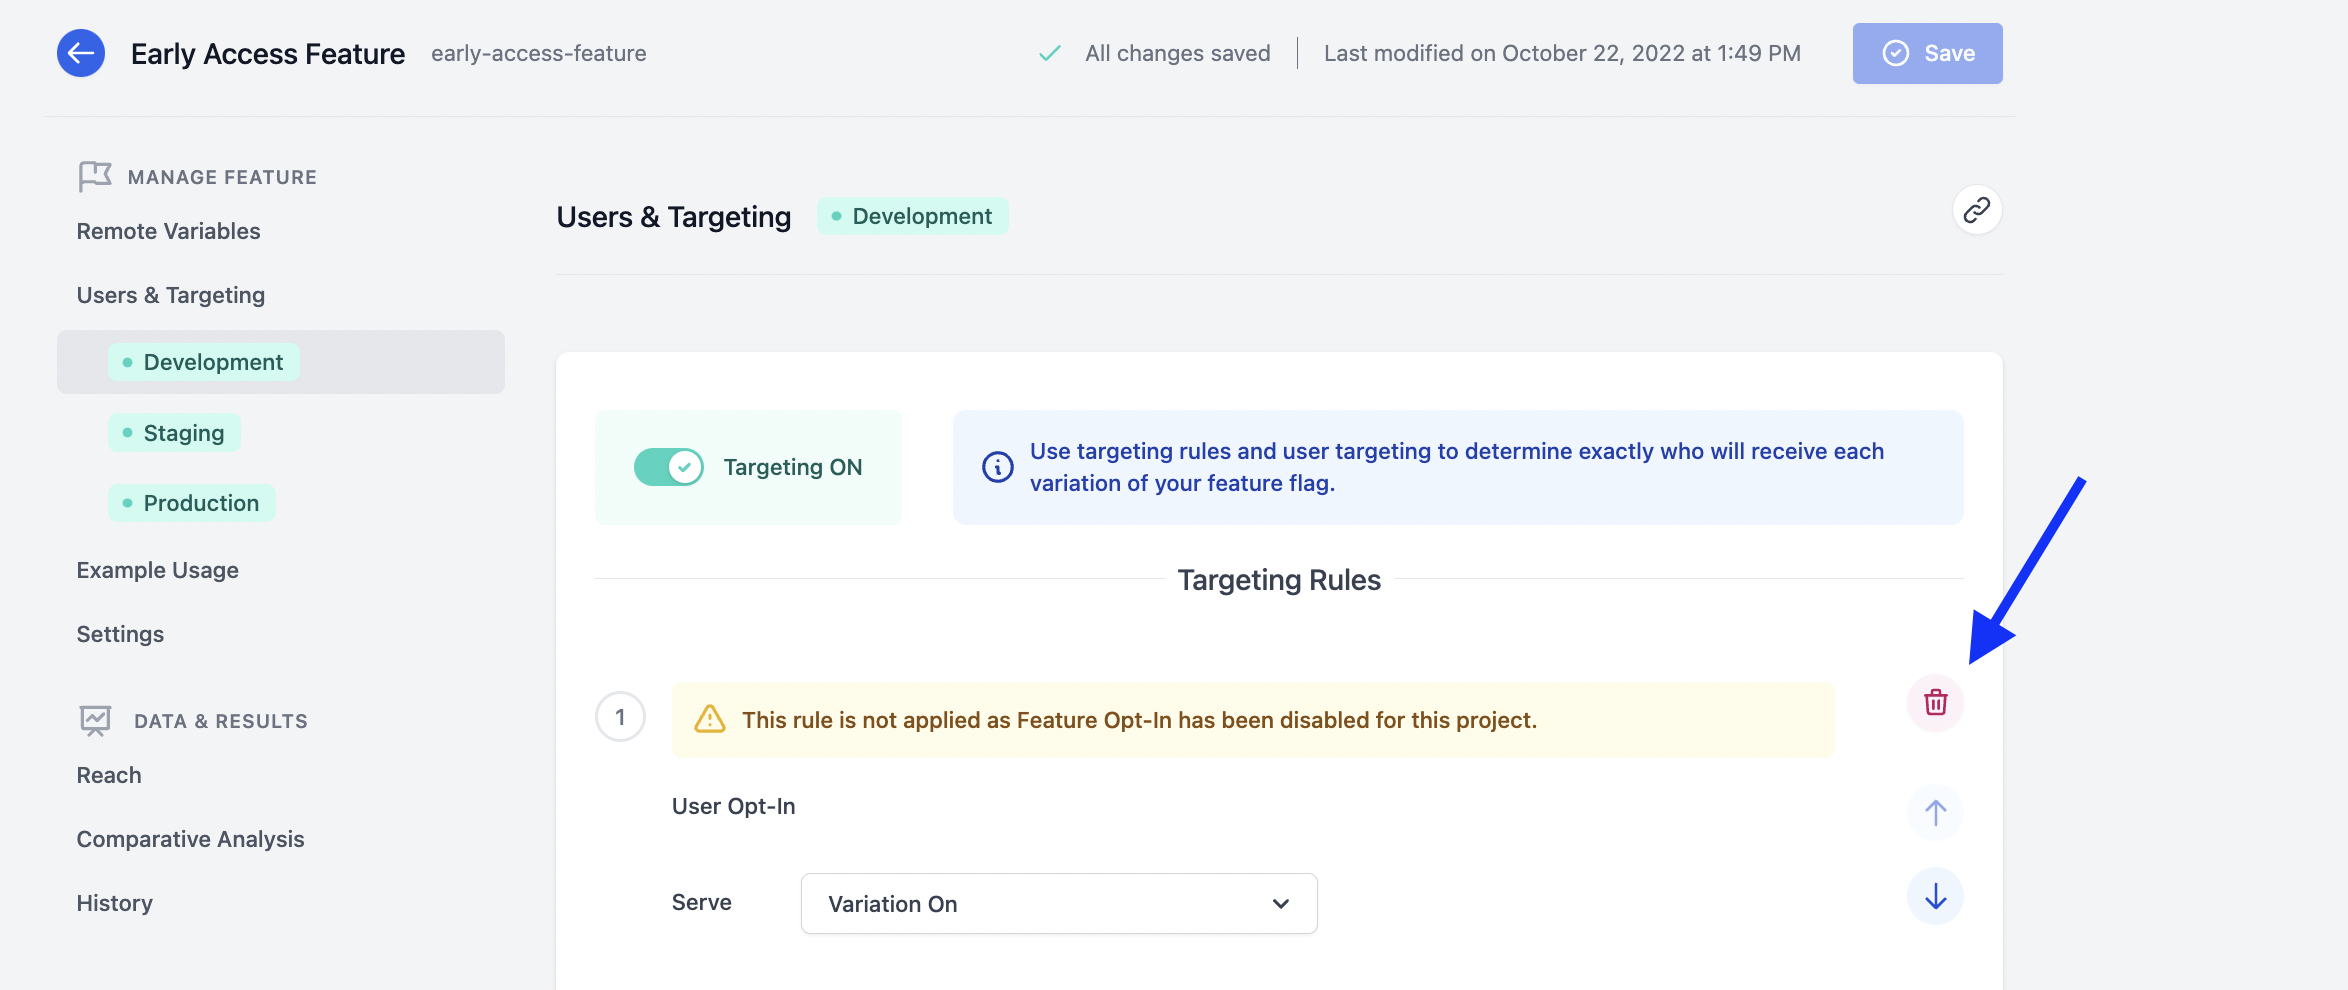
If you disable Feature Opt-In at the project-level before you disable it at the feature level the special targeting rules will remain on each feature, but they will now be able to be deleted. It is also important to note that while the rules still exist they are no longer serving anything to users because Feature Opt-In has been disabled.
Updating Features After a User Toggle
The Feature Opt-In widget comes built-in with an automatic re-fetch of feature configurations. If you implement the widget onto a website that already has the DevCycle JS SDK installed, when a user toggles a feature and hits save on the widget the SDK will automatically check to see if new feature configurations apply.
This means that users will not have to refresh the page to see an update if your website is built to handle dynamic changes, such as by listening to the variable onUpdate callback that is available.